Wednesday 31 December 2014

Nice knowing you 2014....

This time of year I can't help but be reflective.  A blog is a great way to remind you what you have done, I had forgotten some of the things I've been up to!


You've probably seen a hundred of these types of posts but hopefully like me you enjoy reading them, so here is my look back over the last 12 months and my blog's highlights from 2014....


New Craft of 2014 ~ Crochet

One of my New Year Resolutions for 2014 was to learn to Crochet and I am hooked! Excuse the pun, but I am addicted and I now always have a crochet project on the go.  At first I didn't think I would ever get my head around it but after a few weeks of perseverance I started to understand what I was doing and more importantly enjoy it, now there is no stopping me!


#CraftBlogClub

I started the year as one of the new co-hosts on the #CraftBlogClub which has been a lot of fun and a great opportunity to get to know other crafters and bloggers and I have to say we are a great bunch!

I always look forward to our weekly chats but I equally enjoy the challenges too.  

Challenges ~ Relove Me Spring Clean Swap / Winter Challenge part 1 and part 2
I still use the pen pot I made and the teapot cosy given to me by Emma as part of the Spring Clean Swap. 

We've discussed some useful topics and I've shared some of these top tips from the chats....

Selling your crafts
Blogging Hints and tips
Photography hints and tips

and I got to meet my lovely co hosts 

http://fizzijaynemakes.blogspot.co.uk/2014/06/out-and-about-meeting-crafty-folk.html
Not such a great picture of me on the left! Emma is in the middle and Katie is on the right
Out and About

I made sure I got out of the craft den to meet other creative folk and attended small business conferences.  It has been lovely to meet and learn from other small business owners and meet virtual friends in reality. 

One of the highlights had to be when David Cameron unexpectedly turned up to the Home Business Conference! No matter what your political views are, I still think it is pretty cool to have the Prime Minster turn up to speak at a conference I was attending.

Photography Season


In July I ran a Photography season.  This included the first guest post on my blog from a professional offering hints and tips and I made my debut as a guest blogger over on Frugally Peachy showing you how to make a light tent. 

The Year of the Craft Fair

I have attended a lot of craft fairs this year to find the right ones for me....
(click on the images to read more about them)

New Milton Spring Craft Fair - The first fair of 2014

My first time at Harpenden


Another first at Little Fox, Rickmansworth

Back at the Little Fox and New Milton craft fairs in Autumn

Christmas Craft Fairs


It was a mixed bag of success but I am pleased for the experiences as I know which ones to return to next year.  Expect me back at The Little Fox in Rickmansworth and I've already booked New Milton for April and October.  I hope there will be more in Royston and Radlett too.

Also the Year of Celebrations

The year was full of celebrations, I celebrated the first full year of being fizzi~jayne full time, fizzi~jayne makes turned 2 and my blog turned 1....


....and you told me what you love about my blog and what you would like to read more of in my survey.  I am so grateful for everyone who took the time to complete this survey and leave lovely comments which were really motivating. It's good to know that there are people out there reading my blog and enjoying it.  THANK YOU!!

The Most Popular Blog Post this Year was....

.... Christmas Card Peg and String Tutorial 


You can check out other popular posts from my blog in the side bar *points to the right* (if you are reading the web version).

Right, that's it for 2014, I hope you have enjoyed my highlights.

What were your best bits of 2014? If you have shared them on your blog leave a link below so I can check them out....

Thank you to all my readers and supporters of my blog, I am so grateful for you all popping by to read my ramblings and I hope you will continue to enjoy what I have planned for next year!

Wishing you all health and happiness for 2015!


Happy New Year

fizzi~jayne x


Tuesday 23 December 2014

Merry Christmas


Santa's nearly here! I hope you are all looking forward to the festive celebrations.  I'll be spending it with all the family which will be lots of fun and this will be the first year my Nephew will be REALLY excited about Santa coming.

I want to thank all my readers, customers and general supporters.  I truly appreciate everyone of you, without you I could not do what I love everyday and that is pretty cool!

Its been another fab year for fizzi~jayne with lots of celebrations - my blog celebrated it's first birthday, fizzi~jayne makes is now 2 years old and I have been fizzi~jayne full time for a whole year!

I have exciting plans for 2015, I'll be working on re-launching my online shops designing new product ideas and of course I'll be telling you all about it right here along with exciting posts I have planned (I hope you will agree).

In the meantime I'm going to enjoy family time and have a rest for a week.

I wish you and your family a very Merry Christmas and a fabulous 2015!

Merry Christmas!

fizzi~jayne x

Wednesday 17 December 2014

Christmas craft fairs....

It's been a crazy few weeks, well it is that time of year! I had my last craft fair on 6th December and I've been finishing lots of orders plus a winter bug came to visit me (I don't have time to be ill!). Anyway, this post isn't about 'poor me' and what a bad blogger I've been for not popping by to say "Hi" recently, I want to show you the photos from the craft fairs I did in November and December....

My stall at Royston before opening
Royston was a new one for me. It was the second one that was organised by the lovely Laura from Kozmic Dreams and she did a fabulous job organising and promoting it. There were two floors of handmade goodness. It was a busy and successful day with lots of visitors.  It was a friendly and upbeat atmosphere. Laura is looking to do more, I hope she will and she'll have me back!

Everyone getting ready at Royston

My stall at the Radlett Winter Fair 2014

The Radlett Winter Fair was another new one for me and was a very festive affair with Santa and his reindeer. 
A real Reindeer!

We had singers on the stage behind my stall getting everyone in the festive mood, although it was hard to talk to customers at times!


I've been back to The Little Fox Market in Rickmansworth, twice.


The soup was yummy!
I'm usually opposite The Maverick Kitchen, her cupcakes are sooooooooo delicious. The Little Fox is not good for my waistline!


Not everyone appreciated the countdown!

My coasters have been popular, making perfect stocking fillers and Secret Santas

I like this photo I took of my Reindeer Christmas Decoration

Having been to a few craft fairs now I'm starting to see familiar faces and make friends.

This year has been all about trying different craft fairs and I think I have found some really good ones to focus on next year.  Expect to see me back at the Little Fox in Rickmansworth and New Milton Craft fairs.  I hope there will be more in Royston and Radlett too.  Due to the success of bespoke orders this year which has been unexpected, but fantastic, my online shops have been negelected. I will need to give these some TLC and I'll be relaunching my shops with new and exciting products in 2015. 

I'm now finishing off the last custom order and I'll hopefully finish my Christmas gifts I'm making in time!

Are you ready for Christmas?

fizzi~jayne x

Psst.... My Etsy and Folksy shops will be closed from Friday 19th December 2014 until 29th December 2014 so I can take a much needed break and enjoy family time.  I may not be taking orders or making new products but I will be popping up here and on FacebookInstagram and Twitter so please come and say hello! 


Friday 5 December 2014

First Year of Being fizzi~jayne Full Time....

Recently I celebrated being fizzi~jayne full time for a year! Emma from The Vintage Good Life saw my celebratory post on Instagram and asked if I wanted to write a guest post on being self-employed.  As I am a regular reader of her blog I was honoured and jumped at the chance, especially as I am her first guest writer!


Over on Emma's blog I've written about the benefits and challenges of being self employed as well as what I have learnt in the last year of running a creative business. I hope you will find this interesting but I think you should visit Emma's pretty blog anyway, if only to see her beautiful photography!

Click here to read my post, I'd love to hear what you think....

Enjoy 
fizzi~jayne x


Thursday 27 November 2014

Book Review ~ The Handmade Marketplace by Kari Chapman....


I was given Handmade Marketplace by Kari Chapin as a gift when I left my 9-5. Yes, it has taken me over a year to read it and tell you about it! In my defence I was given a few craft/business books when I became fizzi~jayne full time so it took me a while to get to this in my reading pile. Here is what I thought....

This book is aimed at the USA market so for technical information on areas like tax, it isn't relevant if you are based in the UK like me, you don't want to pay your taxes to the IRS if you don't live in America! The rest of the book is an informative, well written book and relevant regardless of where you sell your crafts.

The book is broken down into easy to read sections with no business jargon. Within each section, each topic has their own chapter giving you lots of information to think about, make sure you have sticky notes and a pencil to hand!

Part 1 starts with setting goals, branding, pricing and basic business practices.  The latter section covers some areas which you can relate to any business in the world not just the USA, for example it offers advice on things like having a separate bank account for your business. The areas such as record keeping will still highlight the information you need to find out for your country.  

If you have already started your business you should still find it interesting. I found it useful to read, it made me think and re-evaluate my goals. There is even a section on finding inspiration, so if you ever have a creative block this may help.

Part 2 is all about spreading the word and covers marketing basics, blogging, advertising, attracting media attention and tips on social media. There are also helpful tips on photography which is important to make your products look beautiful if you sell online, but it is equally important for marketing materials and your blog. If you haven't got a blog and are interested in starting one as part of your business, it has a good introduction to blogging and newsletters too.

Want to know about podcasts? this book covers the basics

Part 3 is all about selling, not just online but at craft fairs, in shops and other creative selling opportunities.  Kari even offers advice if you want to start your own craft fair, perfect if there isn't one in your area. If this isn't for you she'll take you step by step through finding the right craft fair, the best way to apply (if required) and be prepared. 

Photography is touched on again within online selling, including useful tips on effective product descriptions and tagging your products which is common on sites such as Etsy. Kari also gives guidelines on shop policies and customer service.

It's full of information for a creative business!

I really enjoyed reading this book, I think because it is aimed at creative folk and not a business text book. It has case studies from what Kari describes as her "Creative Collective" throughout the book who share their experiences and advice. 

Overall it was inspiring and thought provoking.  It's a book I will definitely refer to again, I have lots of notes throughout.  I recommend this if you are already selling your crafts or if you are just thinking about starting or developing a creative business. However, if you are about to start the exciting journey of being an entrepreneur and based in the UK, then I would advise getting information on tax and registering with the HRMC etc. The HRMC website is a good place to start.

Since I started reading a Second Edition of Handmade Marketplace has been released. With the ever changing world of the online markeplace and social media, I would recommend reading this version.  If you do, let me know what you think.

Next on the reading list is Craft a Creative Business: Making & Marketing a Successful Creative Businessby Fiona Pullen.  I have read lots of good things about this book.  I hope to have lots of reading time over Christmas and report back on my thoughts as soon as possible!

fizzi~jayne x

Disclaimer: The Amazon links in this post are affiliate links. By clicking on the image you go to the first edition of the Handmade Marketplace, for the Second Edition click on the text link.

You may also be interested in these book reviews....
http://fizzijaynemakes.blogspot.co.uk/2014/06/book-review-turn-your-talent-into.html
Book Review ~
Turn you Talent into a Business

Book Review ~
The Crafter's Guide to Taking Great Photos

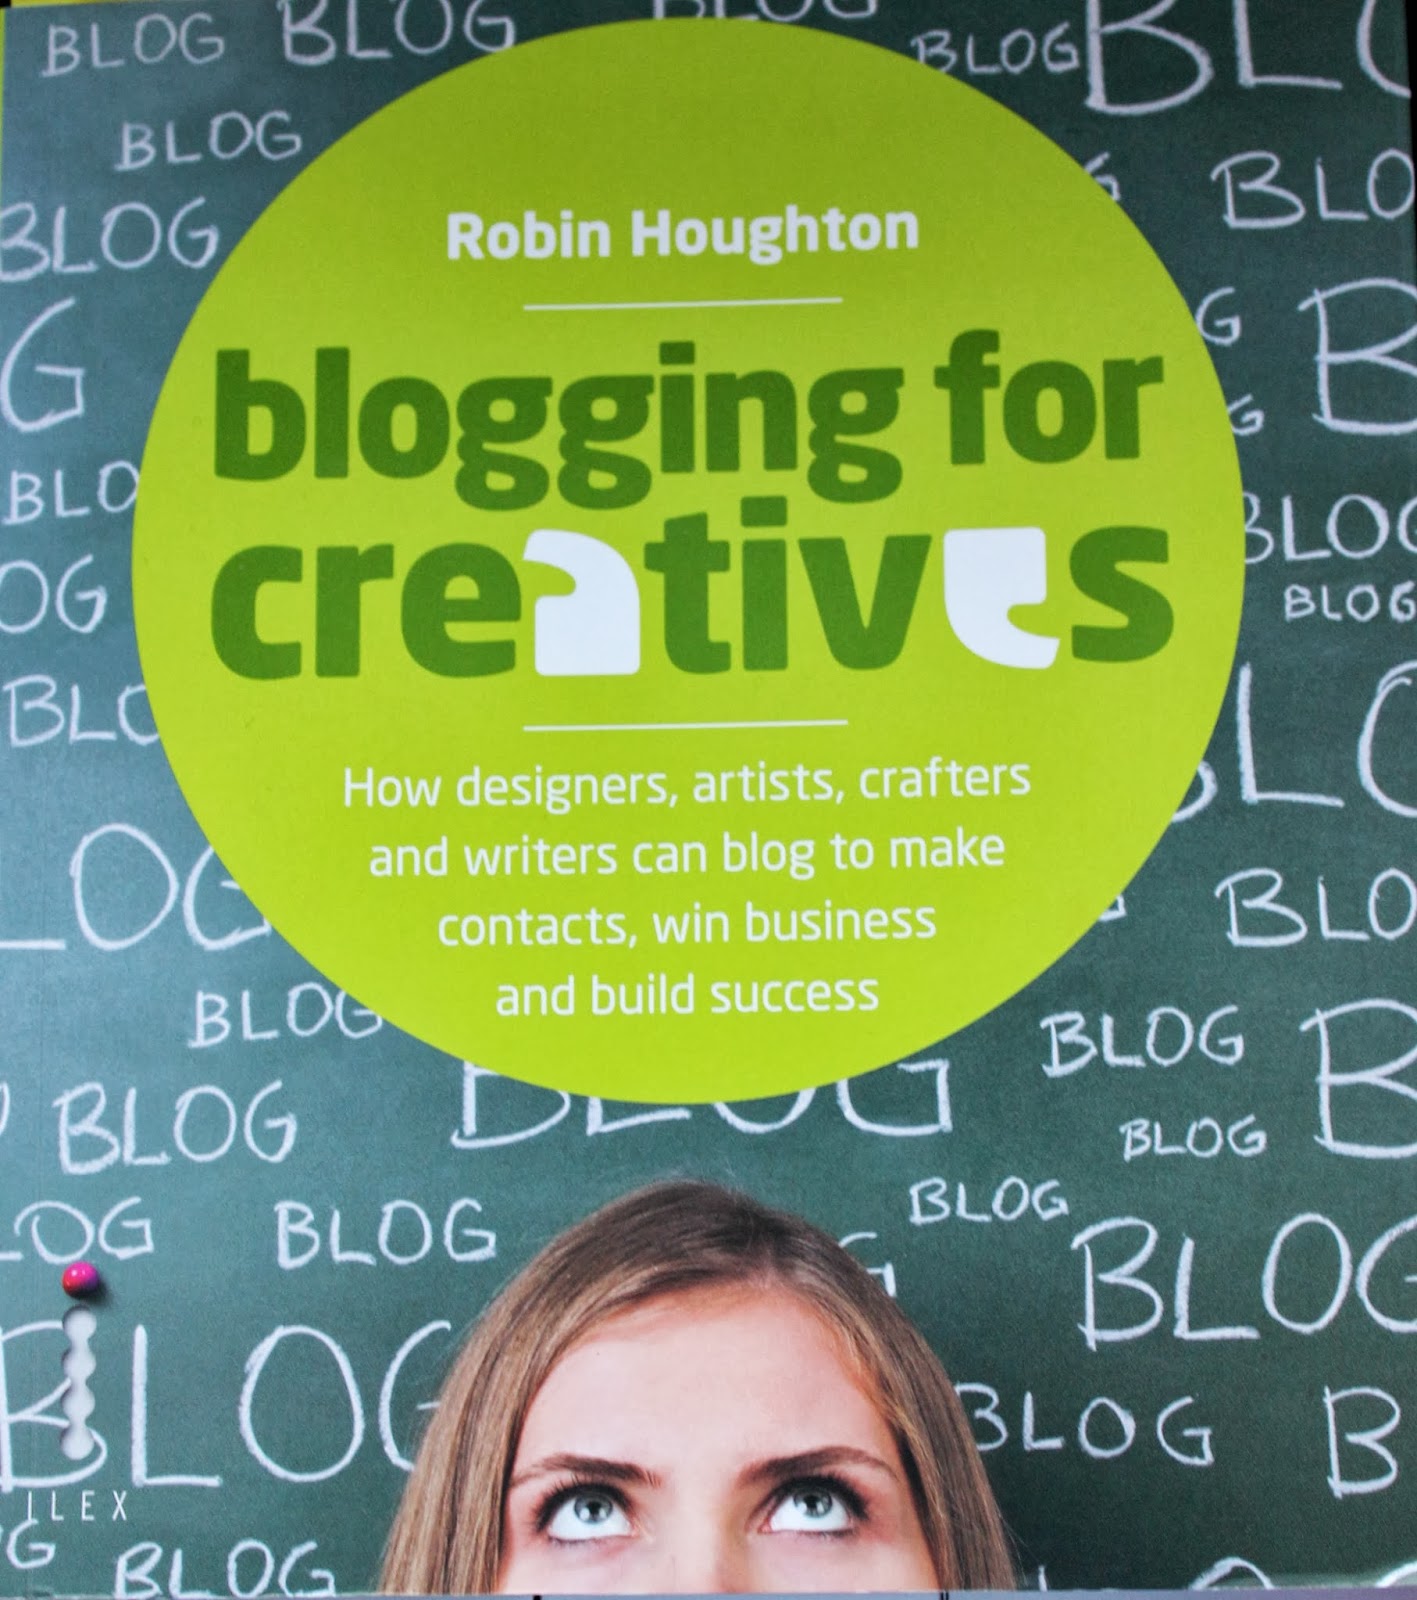
http://fizzijaynemakes.blogspot.co.uk/2014/02/book-review-1-blogging-for-creatives.html
Book Review ~
Blogging for creatives

Sunday 16 November 2014

Bugs and fishes Crafty Christmas Tutorial Link-Up....

Last week, Laura from Bugs and fishes organised a Christmas Crafty Tutorial Link-Up. There are 24 Christmas projects and craft blogs to check out. If you missed my tutorial on how to make a festive Christmas card string with pegs, you can check it out here.

There are so many fabulous projects including, crochet, paper crafting and baking. There are tutorials for making ornaments, stockings, some bunting, an advent calendar, a Christmas wreath, a pendant.... *deep inhale of breath*.... and some gift tags. 

Take a look at these festive tutorials....


Mini Teddy Bed - Grace's Favours
http://www.gracesfavours.blogspot.co.uk/2014/11/how-to-make-mini-teddy-bed-free-tutorial.html

Shiny Reindeer Embroidered Hoop Art - Candyfloss Ramparts
http://www.candyflossramparts.com/free-pdf-pattern-shiny-reindeer-embroidered-hoop-art/

Teeny Tiny Snowman Pendant - i ManuFatti
http://imanufatti.blogspot.co.uk/2014/11/crafty-christmas-tutorial-link-up.html

Nativity Bunting Tutorial - Hoogally
http://hoogally.com/2014/11/nativity-bunting-tutorial/

Floating Pompom Garland - RetroDelicious
http://www.retrodelicious.co.uk/2014/11/floating-pompom-garland.html

Printable Colouring-In Snowflake Labels - It's Organised
http://itsorganised.com/printable-colouring-in-snowflake-labels/


Patchwork Christmas Bauble - Made by Mrs M
http://madebymrsm.co.uk/2014/11/12/patchwork-christmas-bauble-tutorial/


Upcycled Jumper Christmas Stocking with Robin Appliqué - Halcyon Threads
http://halcyonthreads.blogspot.co.uk/2014/11/tutorial-christmas-stocking-from.html

Felt Christmas Mouse Ornament - Molly & Mama

First Flake, Snowflake Ornament - Betz White
http://betzwhite.com/2014/11/first-flake-felt-ornament-tutorial.html#.VGRyNMnCnzQ

Gingerbread House Ornament - Shiny Happy World
http://www.shinyhappyworld.com/2014/11/gingerbread-free-felt-christmas-ornament-pattern.html

Mod Winter Table Runner - Tumus / Little Red Thread
http://tumus.blogspot.co.uk/2014/11/blog-hop-mod-winter-table-runner.html

Shabby Christmas Denim Heart - Cocojude 
http://cocojude.wordpress.com/2014/11/12/shabby-christmas-denim-heart-tutorial/
Fairy Lights Christmas Cake - Cupcakery
http://www.cupcakerys.com/2014/11/a-christmas-cake.html

Washi Tape & Button Christmas Card - The Lilac Linnet
http://www.thelilaclinnet.com/blog/washi-tape-and-button-christmas-card


Christmas Card String & Pegs - fizzi~jayne makes....
http://fizzijaynemakes.blogspot.co.uk/2014/11/christmas-card-string-and-peg-tutorial.html

Felt Christmas Stocking - Vicky Myers Creations
http://vickymyerscreations.co.uk/tutorial-2/felt-christmas-stocking/
Felt Holiday Wreath - The Felt Store
http://thefeltstore.blogspot.co.uk/2014/11/felt-christmas-wreath-tutorial.html

Penguin Pocket Friend or Ornament - Lulu & Celeste
http://luluandceleste.blogspot.co.uk/2014/11/felt-penguin-ornament-or-toy-diy.html

Saint Nick Ornaments - Homemade at My Place

Modern Felt Advent Calendar - Hugs are Fun
http://hugsarefun.com/modern-felt-advent-calendar-tutorial/

Felt Christmas Ornaments - Marc's Treasure Basket
http://marcstreasurebasket.blogspot.co.uk/2014/11/diy-felt-christmas-ornaments-from-marc.html

The difficult decision is which one shall I make first!  Have you any Christmas crafty plans? If want even more ideas also check out last year's Crafty Christmas Tutorials.

fizzi~jayne x


Wednesday 12 November 2014

Christmas Card String and Peg Tutorial....

I'm so excited to be taking part in Laura's Crafty Christmas Tutorial Link Up today! If you haven't checked out Bugs and Fishes definitely pop by where you'll also find the links for lots more Christmas crafty tutorials.

But first, today I am sharing a free tutorial for a way to show off your Christmas cards in your home.


What I used:

  • The templates provided below
  • Felt, in Christmassy colours
  • Spray starch
  • Wooden pegs
  • Baker's twine / Ribbon
  • Scissors
  • Chalk / pencil
  • Glue - You can use fabric glue but I used Silicone glue - Pinflair Glue Gel.  It bonds anything to anything (in my opinion, I'm yet to find something it can't stick together!). Whatever glue you choose to use, you need something strong enough to bond the felt to the pegs and embellishments.
  • Embellishments of your choice - I used gems, bows and ribbons from my crafty stash


How to make your Christmas Card String with Pegs....

1. First off prepare the felt. In order for them to be more stiff, spray starch liberally on both sides and leave them to dry flat overnight, ideally on a radiator. 

2. Print off and cut out these templates I have drawn for you.
To print templates click on image or click here
3. Draw around the templates on the felt using chalk or a pencil. I prefer chalk as any marks can be brushed off but it's difficult to see on white felt.


4. Cut out the shapes

There isn't a right or wrong side to the template so if you can see pencil marks just flip the felt shape over.


5. Embellishing the felt pieces

For the Stockings

Using cream or white felt you can add a trim.  The guidelines are on the template.


Use glue to bond the trim to the stocking. Hold in place for a few seconds to make sure the glue grabs.

You can decorate your stocking with anything you find in your crafty supplies or craft store.

When using ribbon, glue the ends at the back and wrap around, like so...


I also decorated my stockings with bows and gems found in my crafty stash


I also found this Pom Pom ribbon, perfect!


Candy Canes

To make the candy canes, you will need ribbon.  I cut the canes out of cream felt and used red satin ribbon.


Glue at one end, wrap around the cane and glue the other end.


Top tip 1 - I use a cocktail stick to add glue so not to add too much
Top tip 2 -Use the peg to keep the one end in place


Holly

For the holly I simply cut out green felt with the template and added a button for a berry. You could add red gems or small pom poms or use embroidery thread to create French knots.


6. Now, attach your felt pieces to the pegs by adding glue to the top half of the peg.


7. You can now hang your baker's twine or ribbon on to the wall.  If you don't want to leave permanent marks on your wall I recommend Command Decorating Clips with Clear Strips. I use them for my fairy lights on my mantle piece, they hold really well and come off your wall easily without leaving marks.


Glittery Pegs

For added glitz, why not add glitter?....


As well as Glitter you will need a good PVA, I use Cosmic Shimmer Specialist Acrylic Glue for so many of my crafty projects.  It dries clear and holds brilliantly which will prevent shedding of the glitter. Although I can't guarantee there won't be any glitter shedding, using a good glue along with the following steps will help keep most of it on your peg.


Place the peg on copier paper and cover the peg with the PVA glue


Liberally pour glitter over the peg


Tap off the excess and leave to dry, ideally overnight.  Once dry lightly dust with a soft brush to remove any more excess.

The glitter left on the copier paper can be poured back in the pot.

You can leave them like this or add felt decorations, or have a mix of the two on the string/ribbon.


I hope you have enjoyed this tutorial.  If you make yourself a Christmas card string with pegs I would love to see the photos!  


This tutorial is for non-commercial use only. You can use it to make as many card strings for yourself, gifts or to raise funds for a charity but please don't make any to sell for profit.

If you want to blog about this project, remember to credit me and link back to this page on my blog. Please ask permission before using my photography and please do not reproduce my entire tutorial or share my templates on your site.  Thank you


Please note, the Amazon links are affiliate links which means if you purchase anything I earn a few pennies (and I mean pennies!) to support my work on this blog. I only recommend products I use myself.