Monday 17 February 2014

Things I can't live without in my craft den....

I wanted to share with you what I use all the time (other than card and paper) that I can’t live without in my craft den….
  1. Guillotine ~ It has such a good slicing sound and can trim such small slithers, I am easily pleased! I used a trimmer before but I used it so much I was replacing the blades all the time, whereas this guillotine sharpens its own blade. I love it! I still use the trimmer it's not completely redundant it just has an older, stronger brother to compete with.
  2. Glue ~ I have all types of glues & tapes for different materials and uses. For a crafter this is a necessity, but when thinking about this list I could not believe how many different types of glue I have and I use them all! One thing I got for Christmas is a hot glue gun,

    I love it! It can also be used for cool effects,

    I want to use it for everything!
     
  3. Glass Mat ~ A practical one, I do all my work on this mat, it protects my work surface but also it works well as a paint pallet, I can use my hot glue and heat gun and it doesn't warp!
  4. Music ~ I can't work without and since working from my craft den I have been listening to a lot more of my CD collection (yes, I know CDs are so 90s) and I have a lot to choose from (approx. 300-400). Soundtrack this week has been some old school club classics from the 90s, Bon Jovi and Pink.
  5. Meet Colin....
    He is my Cuttlebug which I use for embossing and die cutting and an important part of my crafty life.  Needless to say I have a lot of embossing folders and building a collection of dies!
     
What can you not work or live without?

Thursday 13 February 2014

Book Review ~ Blogging for creatives....


For my birthday I was given a great book Blogging for Creatives by Robin Houghton.

I had started my blog when I read the book but it was still relevant and really useful to a newbie like myself. So I decided I would let you know what I thought of it….

I will say straight off, for those who are new to blogging or are thinking of starting one this is ideal, so read it! It will help you decide your niche, explain widgets, pages and posts and the general blogosphere

One of the things I was agonising over when I decided to start a blog was which platform to use to host my blog. After lots of googling and research on the web I decided to use Blogger and I am happy with it.  So I didn't read the chapter about the pros and cons of different platforms as I didn't want to question my decision! However, if you haven't made a decision this is a good chapter to find out more about Blogger, Wordpress and Tumblr plus how to set up your blog. 

What I found very helpful was how to create great content, this has given me ideas for different posts (watch this space) and if you have a blog and sometimes lose your mojo this is a great reference.

The book includes useful marketing and search tips to get your blog seen amongst the 169 million that were out there when the book was published and new blogs are being created all the time, at a crazy rate of 5,000 a day, really! I am so intimidated now, is anyone out there reading my wee blog?!

You may not feel the need for metrics and analysis if you are blogging for fun or have no intention of making money from it, (if you want to earn money from your blog there is a chapter that discusses the options). However I still want to know if what I am doing is successful.  

This book has made me think about the reason for my blog and how I will measure its success.  I started this blog to build a community (there is also a chapter on growing a community) whilst documenting my journey of turning hobby into business.   Through this I hope to encourage other creatives to be able make money from what they love.  It also lets my readers see who fizzi~jayne really is. 

So how will I know if my blog is successful?  I have set goals, I hope to have increased my followers to a number with 4 digits and be on Bloglovin's popular list for DIY/ Crafts over the next 3 years. These are the measurable results but most importantly I want to have fun with it.  

On every page there are also lots of examples of established blogs to check out, there are so many I haven’t had a chance to have a look at them all! I have had a peak at a couple of the resources for aspiring bloggers and have signed up for newsletters from Chris Brogan, he seems to have down to earth blogging advice.  I also signed up to newsletters from Lemon and Raspberry, I can’t remember how I came across this site but they email advice on building a blog which is a good read with a cuppa.

In summary this book covers a lot and there are resources for further reading and a great starting point for a newbie.  If you are a pro blogger there are probably better books or resources out there for you.

The layout isn’t to my liking in places, it can be too busy but at the same time it is visual which us creatives like!

These are just my opinions and I hope you have found it useful. If I stuck to the advice of the book I would have kept to 250 words or less but it was impossible to do the book justice.  So if you are still reading this post, thanks and *high five*!

What creative/ blogging/ small business books have you read and would recommend?

fizzi~jayne x

Disclaimer: The Amazon links are affiliate links

Saturday 8 February 2014

Competition winner!!....

Thank you to everyone who entered my competition over on my Facebook page! I now have a winner!!!

I used Random.org to generate a winner and they are (drum roll please).....

Melanie Jayne Le-Fort


Congratulations Melanie!! (please can you send me a direct message via my Facebook page with your details, thanks!)

I will be adding Melanie's favourite quote to this wall hanging

There wasn't an overall favourite quote but the top 3, all with 3 votes each, were:
  • Leave a little sparkle where ever you go
  • I have good taste, but I don’t have the money to prove it
and what Melanie voted for....
  • We are all in the gutter, but some of us are looking at the stars. Oscar Wilde.
In the meantime, I made myself a wall hanging for my Craft Den. I wanted something to make me smile each day, so I made it playful and tried different fonts, what do you think?....


Thursday 6 February 2014

Project ~ Love is in the air....

This year I wanted to share some of my favourite crafty techniques and projects.  As I was thinking what to share first, an opportunity came up to feature products that I use from one of my favourite craft suppliers, Handy Hippo.  I have used Handy Hippo for a couple of years now so it was an easy decision to write this post. Although it is a sponsored post all my views, images and techniques are my own.

As it is nearly Valentine's Day I thought I would share the Valentine's card and gift box in one I have made....


How did I do it....

I used my trusty guillotine (a must have in my Craft Den) to trim A4 Pearlescent card to 14x28cm.  The colour is a pretty pink and the light reflects different shades off the pearlescent finish.


The card was folding in half and folding one half in half again to make it an easel card.


The stopper to make the card stand up as an easel was made by stamping the sentiment from the Wild Rose Vintage Heart stamp set " you have stolen my heart". This set has such a romantic feel and co-ordinates with other stamps I have from their range.


Wild Rose Studio, Vintage Heart Clear Stamp Set
I stamped on to the pearlescent card in peony coloured ink and used clear embossing powder to give it a slightly raised and shiny effect.   This was mounted onto silver mirror card for a border and attached to the card with a 3D foam pad to create a stopper.


I used the Spellbinders Nestabilities Die, Wavy Rectangles on white card to write a personal message.  I used Distress Ink in Tattered Rose to give it a blush look


I love creating my own background designs on plain card.  For this project I stamped the heart from the Wild Rose Vintage Rose stamp set in 2 colours randomly, peony and lilac, then highlighted areas with iridescent glitter. 

I stamped twice before re-inking to give a shadow/paler impression giving the design more depth.


I stamped the same design on to the sides of the box

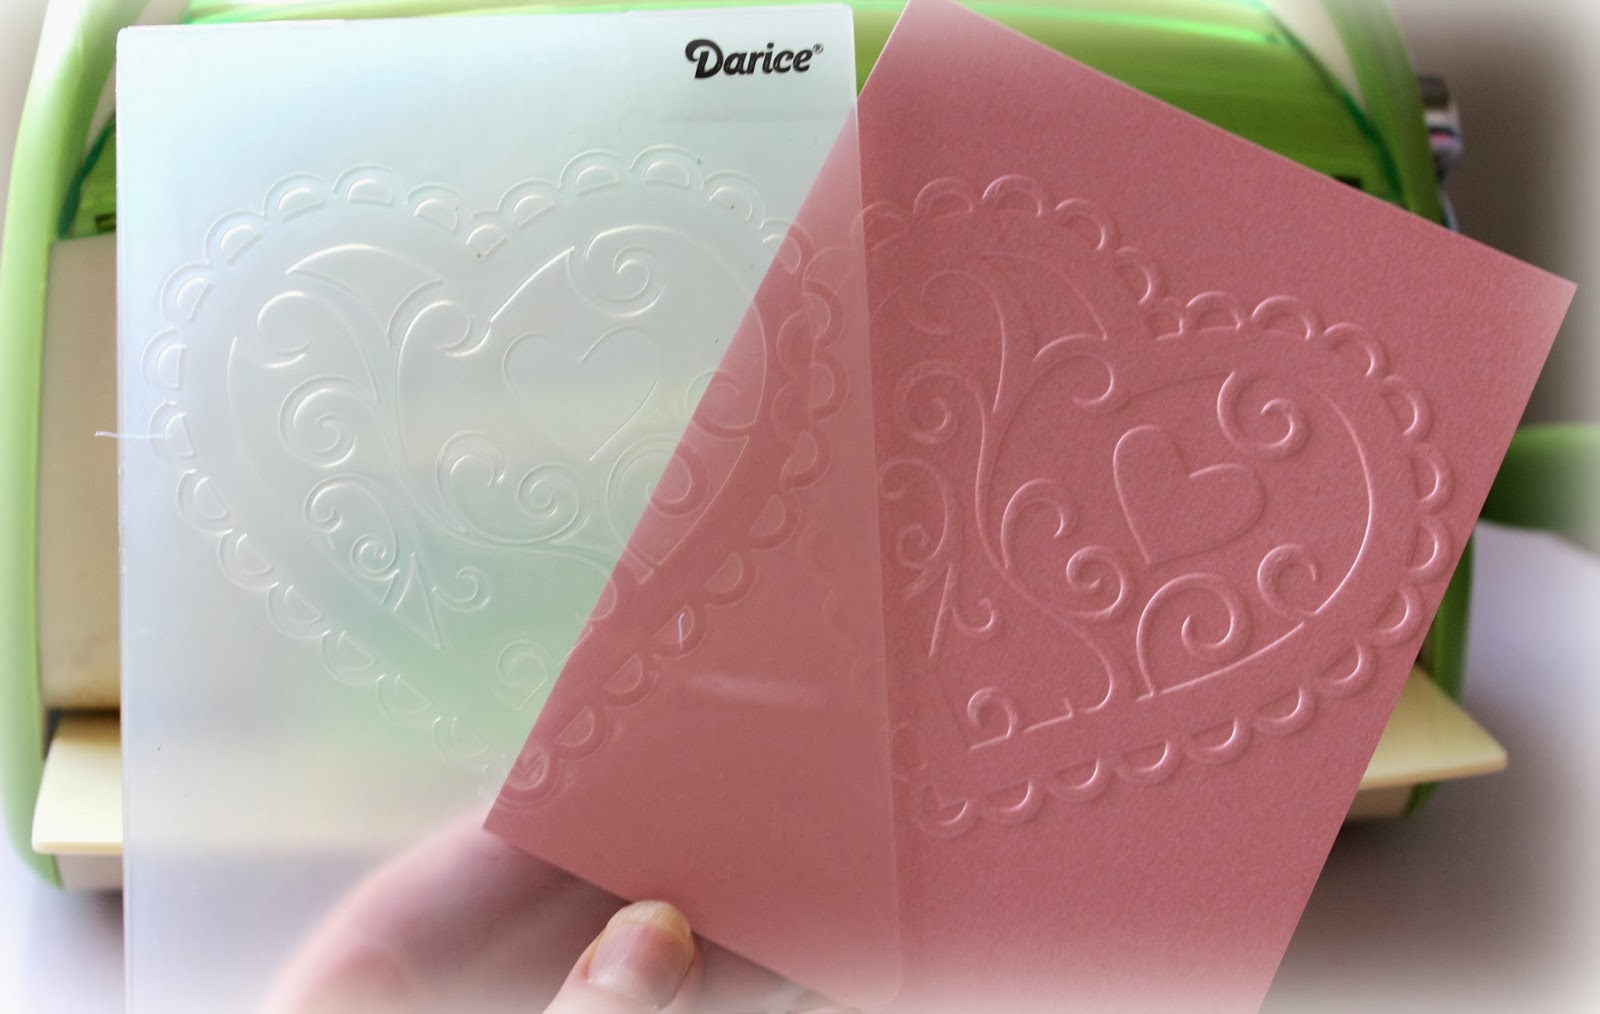
I am a big fan of embossing folders, I have a drawer full and when I think I possibly can't need anymore I see ones like this Darice Valentine's Heart.  I used the pearlescent card again to emboss this design and cut it out the heart, cutting off the scalloped edge. I embossed the heart again using American Crafts textured card in Blossom, I cut this out so when I glued the pearlescent heart on top of the textured card the scalloped edge of the blossom can be seen. 


Darice Valentine's Heart Embossing Folder


I use a Cuttlebug (aka Colin!) for my embossing and die cutting

I love the metallic sheen effect gilding wax gives to an embossed or textured design, I used Cosmic Shimmer 
Golden Lilac Gilding Wax over the embossed heart.


I used the same heart stamp on white card and I cut this out and glued to the small heart of the embossed design. I used the same technique to embellish the drawer to the box.

I had a scalloped heart in silver mirror card in my crafty stash which made the topper pop.


The gift box was made to have a drawer to fit a small gift , measuring 14x14x3cm, perfect size for yummy chocolates or jewellery (I can but only hope!).

 
It is best to use wet glue to make a box, I use pegs to hold the shape whilst the glue dries.
To be able to pull the drawer out I punched a hole and threaded silver ribbon.


I hope you liked my first crafty technique post, what do you think?


What I used

From Handy Hippo....
Darice Embossing Folder, Valentine's Heart
American Crafts 12x12 Textured Cardstock - Blossom
A4 Pearlescent Card by Centura Pearl - Fresh Pink
Wild Rose Studio Clear Stamp Set, Vintage Heart
Finger Lift Tape
Silver Narrow Ribbon
Inspire Me Card Snow White
Creative Expressions Gilding Wax, Golden Lilac
Spellbinders Nestabilities Die, Wavy Rectangles

From my crafty stash....
Silver Mirror Card
Various colour ink pads
Wet Glue
Pearl effect embellishments
3D Foam Pads
Clear embossing powder
Distress Ink
Glitter

This tutorial is for non-commercial use only. You can use it to make as many cards for yourself, gifts or to raise funds for a charity but please don't make any to sell for profit.

If you want to blog about this project, remember to credit me and link back to this page on my blog. Please ask permission before using my photography and please do not reproduce my entire tutorial on your site.  Thank you