Monday 31 August 2015

A day out of the craft den....

I had a fun filled day out of the craft den the other week when I met up with Laura from Bugs and Fishes.

It's always nice to catch up with Laura, we met in London to start the day at the House of Illustration to see the Ladybird by Design exhibition celebrating 100 years of the classic Ladybird books. The exhibition features the original illustrations of the classic Ladybird books.  This took me back to my childhood, although their golden years were 1950s -1970s they were still popular in the UK when I was growing up in the 80s.


I recognised books that I had as a child. Due to the period they were published, the books showed a very traditional and stereotypical view of Britain at this time and very different to modern life now. The artwork was amazing and it was interesting to see how they manufactured the books when there were still paper shortages after the Second World War.

This museum is relatively new only opening last year. If you have the chance to go before this exhibition finishes on 27th September 2015 it's well worth a visit.

I treated myself to some bits from the shop.  I love these Tupperware boxes to keep bits and bobs in. They will look so cute in the craft den

I also bought some postcards too, to add to my collection.

The museum is on Granary Square where there is a cool water fountain known as the Granary Squirt.  


This was a nice place to sit and have lunch.  The water feature was mesmerising and there is an App where you can control the formation, how cool is that?! I wish I had downloaded the app and played, I intend to go back at some point when the nights draw in to see them lit up in the dark so maybe I'll have a go then.

The plan for the rest of the day was to take a walking tour around the Kings Cross area which is currently going through an exciting redevelopment project, but the weather was too wet. So instead we headed towards a building to stay dry that was advertising a cafe and gallery. What we found was Kings Place which looks like an office building, and part of it is for the Observer and Guardian newspapers.  We did not expect to find a huge building with a lovely cafe, where we ate cake, three art galleries which are commercial but are free to look around and that's not all, it has restaurants and a concert hall too for music events.  It opened to the public in 2008 and we had no idea it was there.

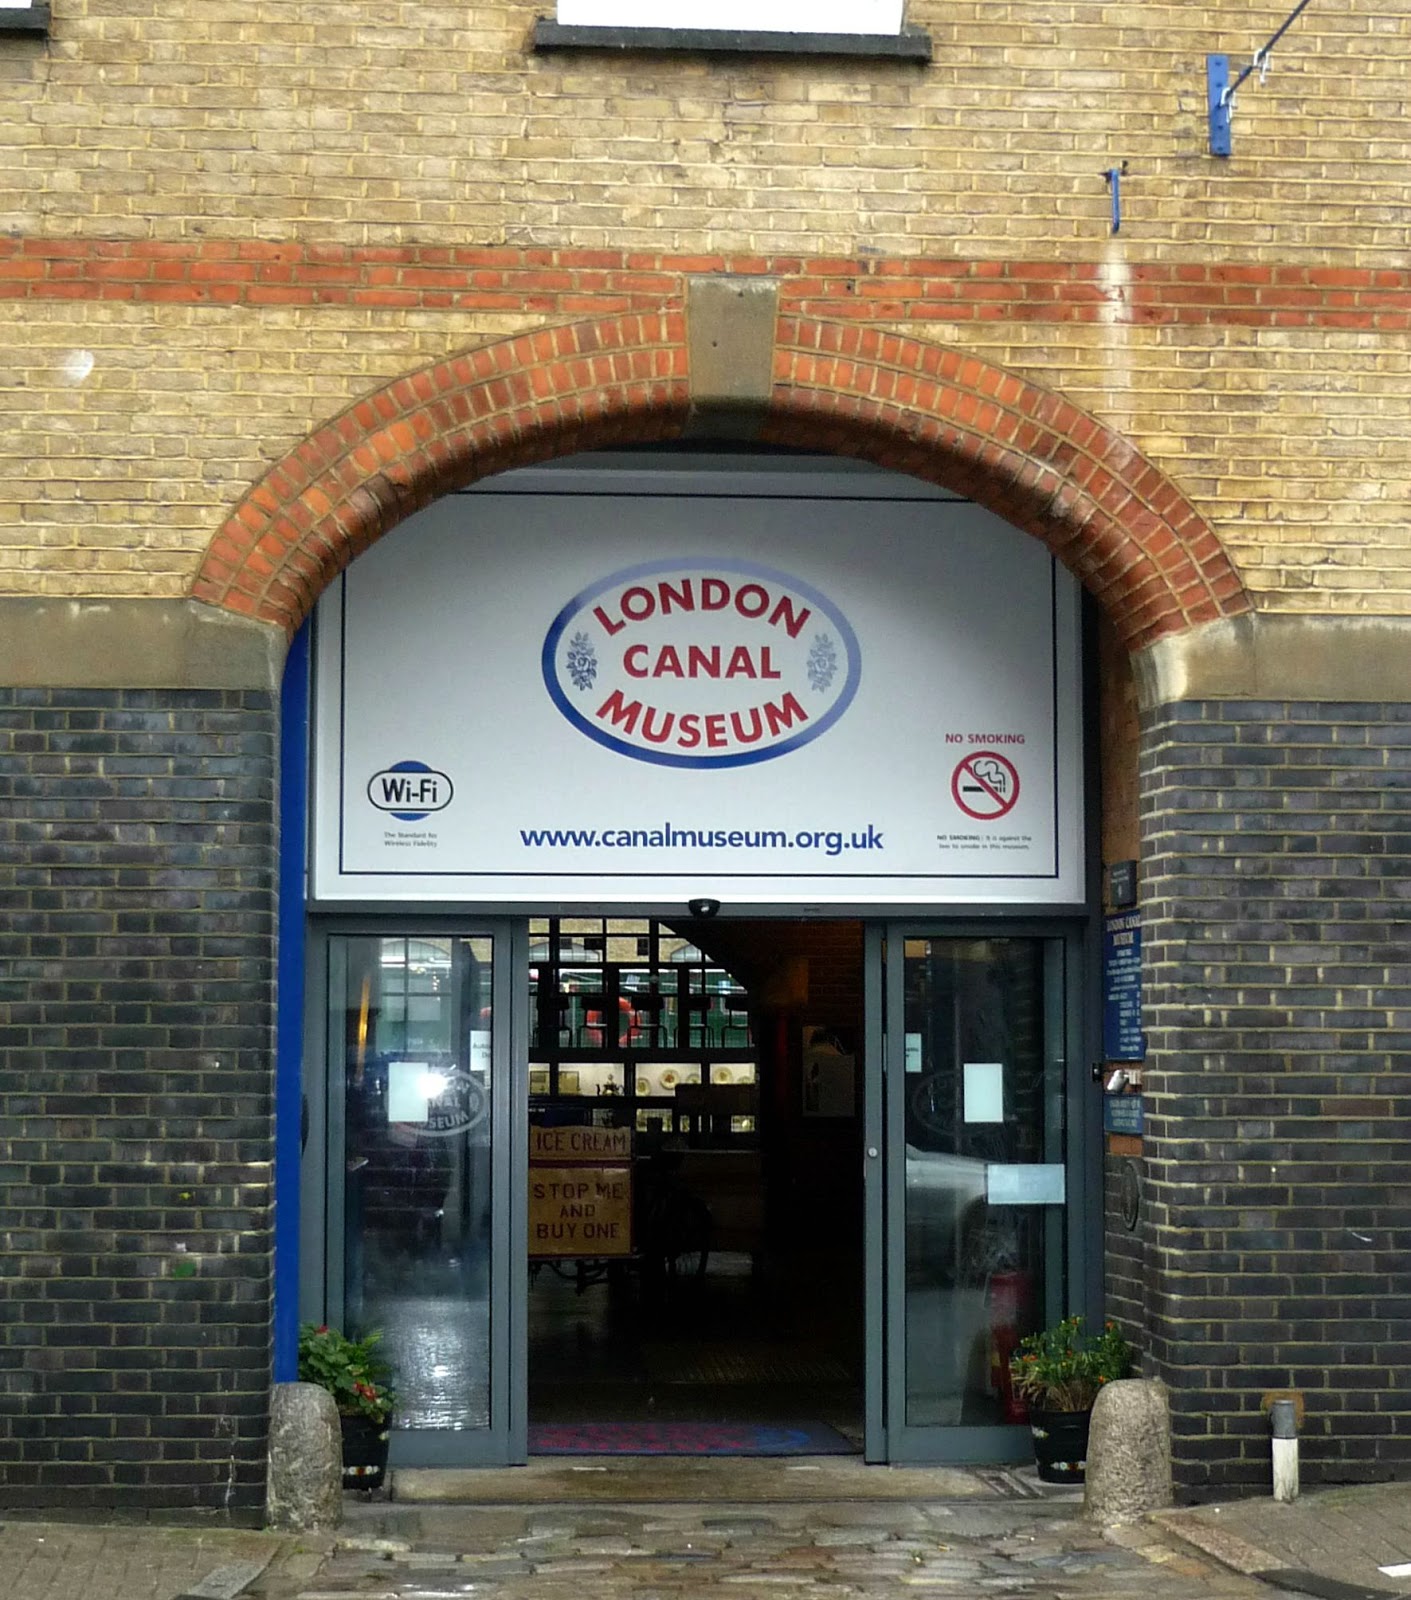
It backs on to the canal and we could see the London Canal Museum which was perfect for our next stop as it was still raining.


As we walked round dodging the puddles, we came across this feature on a building, random enough for me to take a picture.


The London Canal Museum was interesting with lots of narrowboat folk art which is very fashionable at the moment in craft.


The rain stopped long enough for us to go outside to look at the boats that were moored up


I'm not sure how long this bike had been there or if it had just been parked amongst the weeds.

The building was home to an ice store in the Victorian era when we imported ice from Norway, you would have thought the UK was cold enough to make our own, but apparently not! Carlo Gatti was the entrepreneur behind the business that imported ice in this building and was credited with making ice cream available to the general public. There was a history on the trade which was eye opening, did you know that ice cream was originally sold in glass cones and they were not washed between uses? yuck!  


Once we left the London Canal Museum we wandered back towards Granary Square and visited a book shop on a barge....


I know, cool right?! This is a great second hand book shop on a barge, with so many books! I loved the quirkiness but I did feel a little queasy being on the water.


On the way back to the train station we came across lots of signs with quotes (and you know I love a quote) on a retail unit not yet let....


They made the buildings not yet in use look pretty instead of sad and empty.


Having a day out and chatting with Laura has inspired me with some great ideas. One of which is a new feature coming soon ~ fizzi fun friday!

fizzi~jayne x


Monday 24 August 2015

August Craft Fair and fizzi~jayne makes.... first stockist!

I had one craft fair in August which was at one of my regular and favourite fairs in Royston.  


Even though it was prime season for everyone to be away on holiday we still had more footfall than I expected. I think that is down to the hard work of the organiser and the local support we get, which is brilliant.


I was also excited to see the new No3 Royston. If you follow me on Facebook and Twitter you may have seen my excitement about No3, it is a new independent shop opening in Royston by the same organiser of the craft fairs. I am thrilled that a range of my products will be available in the store when it opens on 5th September!!

I am sooooo excited to be a part of this venture which is supporting small creative businesses and can't wait to see everyone else's handmade products on the shelves. 

If you are local I hope you can pop by when it opens, you can find the shop at 3 Melbourn Road, Royston, Hertfordshire, SG8 7BP.  The shop will be closed on fair days as it’s only a short distance to the Town Hall where I will be joining the other crafters from the shop.

I now have a busy and exciting week making stock ready for the launch!

New shop opening on 5th September at 9:30am!

fizzi~jayne x

Thursday 13 August 2015

5 minutes with....


Do you remember Sally who wrote a guest post for me sharing her tips on blocking crochet?  She has interviewed me for her blog. So grab a cuppa and spend five minutes with me whilst I share what I've been working on, my tips on selling at craft fairs and my plans for fizzi~jayne makes.... 

There is also a discount for readers to use in my shop at the end of the post.

Check it out here.

fizzi~jayne x

Monday 10 August 2015

fizzi~jayne's crafty tips for stamping.... #3 how to stamp

If you have been following the series so far you will know which ink to choose and have your basic materials to get started, so now lets get stamping!

(In this tutorial I use an unmounted acrylic stamp, details of other types of stamps are covered in #2 Basic Materials Needed).


These are what I will be using in this tutorial plus I have some baby wipes to hand out of shot.  Please excuse the state of my stamping block, it is well loved!  I am working on a glass craft mat.

Preparation

  • Use a flat, stable surface to work on
  • Protect your work surface ideally with a craft mat but if you use something like newspaper ensure the area is completely flat and smooth.
  • Choose the right ink for your project (see #1 types of ink post).
  • If you are using an acrylic unmounted stamp like in this tutorial you need to apply this to your stamping block.  Acrylic stamps cling to blocks without any need for adhesive or foam. Rubber stamps need cling foam, more details about stamps can be seen in the #2 basic materials post.
For acrylic stamps it is best use Sellotape to lift off any residue left from the manufacture process. Just gently press the Sellotape on the stamp and lift, just like you are getting lint off your clothes.


Also with any new stamp before stamping on your project try it on a scrap piece of paper or card to get used to how much pressure you need to apply.

Now you're ready....
  1. Take the ink pad to the stamp, not the other way around and gentle tap the ink over the stamp. This way you have more control of where the ink goes and how much you put on, ensuring there is an even coverage.You don’t need to use extreme pressure, squashing the stamp into the ink pad will get way too much ink on the stamp! Look at the stamp to make sure it’s completely inked.
  2. Wipe ink from around the edge of the stamping block so you don't get any unwanted ink on your project (also make sure your fingers are clean after applying the ink to avoid unwanted fingerprints on your work).
  3. Decide where you want the image and stamp straight down without rocking. You need to be able to apply pressure from above so standing might help. Always keep one hand steady whilst the other applies pressure across the stamp. You don't need a lot of force but depending on the detail of the design, how big the stamp is and the type of stamp, some may need more pressure than others, this is why it is best to practice on a scrap piece of paper/card.
  4. Lift the stamp straight up.
Et voilà!


If you are using a detailed image or you want more definition and you are not intending to use alcohol pens, Archival ink will give a better impression....


Now clean your stamp in warm soapy water or with a baby wipe without rubbing to hard. If you are using a solvent based ink you will need a specific cleaner.

As with any craft, things may not go as you imagined but if there is a smudge or you missed a bit or there is ink on the page where it shouldn't be, don't panic and don't throw it in the bin! Not straight away, you may be able to save it by using your paints / pens to disguise it or use an embellishment to cover it up.  

This may not be possible and even if it is you want to know how to avoid these happy mistakes happening again, right?  So here are some top tips to help you get the results you want....

Troubleshooting....

Lines of ink from the stamping block
  • The acrylic block may be too big for your stamp which can lead to the block rocking.
  • If there is ink on the block you need to wipe around the edges before stamping with a damp cloth or baby wipe.
  • Are you taking the ink pad to the stamp for application?

Shadows / smudges / double image
  • It's likely the stamp moved. Try and keep a steady hand and don't think too much about it, just stamp and always keep one hand steady on the block whilst the other one is applying pressure. Try not to rock or move the stamp.  This may take some practice when you first start.

Missed patches 
  • Not enough ink on the stamp.
  • You didn't apply pressure on that area. 
  • If it is a detailed stamp or you are stamping onto a material like MDF you may need a foam mat to help get an even coverage. 
  • Is there something underneath your project that shouldn't be there?
  • Are you in the right position? You need to be applying pressure from above.
  • Are you using textured card?
Missed patches can sometimes be filled in by using your pens. 


Still not getting the right results?
  • Are you using the right ink? Check back to my first post in the series, as some inks are better for detailed, crisper images.
  • Try a different type of paper or card.
  • Is the stamping block the right size for the stamp? It needs to be slightly larger than the stamp. 
  • Try standing up so you are above the stamp giving you more control and it may be easier to apply pressure on the stamping block.
  • Placing a foam mat (or mouse mat) under your paper/card may help.

Don't worry if you make a mistake, just have fun, what's the worst that can happen? You have to throw a piece of card away, no big deal.  

If you have any problems I haven't mentioned please ask me in the comments as I would love to help and I will have made the same happy mistakes at some point.

You now have the materials and the techniques to get you started so if I have inspired you to start stamping I would love to see your projects.  You can tag me on social media or leave a link in the comments below. Or please feel free to email me your photos at fizzijayne@gmail.com and let me know if I can share your work, don't worry if you don't want me to I would just love to see what you have done.

Coming soon ~ Next in my stamping series I will show you a really cool technique, heat embossing!

Happy Stamping!


Also in my crafty tips for stamping series....


http://fizzijaynemakes.blogspot.co.uk/2015/07/fizzijaynes-crafty-tips-to-stamping-1.html
#1 Types of ink

http://fizzijaynemakes.blogspot.co.uk/2015/08/fizzijaynes-crafty-tips-for-stamping-2.html
#2 Basic Materials Needed

Tuesday 4 August 2015

fizzi~jayne's crafty tips for stamping.... #2 basic materials needed

Welcome to the second instalment of my crafty tips for stamping! 

In part 1 I covered the different types of ink available which you can check out here.  As well as ink you will need the following materials....

Stamps

There are different types of stamps
  • Mounted rubber stamps
  • Unmounted rubber stamps
  • Acrylic stamps

Mounted Rubber Stamps


These are what I began with. These stamps are supplied ready to use already mounted onto a wooden handle. Unlike unmounted stamps, you don't need anything other than an ink pad to get stamping which makes them an ideal stamp to get started with and have a go.

The down side of these are they are more expense to buy due to the wooden handle and take up more storage space compared to unmounted stamps.

Unmounted Rubber stamps


Unmounted rubber stamps consist of just the 'die' part of the stamp, which is the rubber bit with the design etched in. These then require mounting before use by using a foam cushion which you can permanently mount or a temporary fix with a cling foamto use with acrylic blocks.  Some unmounted stamps come complete with a foam cushion which saves you having to cut and buy the foam to mount them with.  


However, there is one brand of block you can use without the need of a foam cushion, Rock-a-Blocks. Instead you use a temporary spray adhesive to attach the stamp.  This only works with these blocks due to their design and the different technique with stamping.


Unmounted stamps are often cheaper than their mounted counterparts.  They also take up a lot less space making it easier to store. However you will need a suitable stamping block. 


Mounted or unmounted, deep etched rubber stamps are ideal for stamping onto fabric or into soft surfaces such as pottery or air dry clay.


Acrylic stamps


These are my favourite type of stamp to use. These clear stamps temporarily adhere to acrylic blocks and because they are clear it makes the precise placement of stamps simple and straightforward. After stamping, clear stamps are simply cleaned and popped back onto a backing sheet ready for the next use.


Acrylic stamps come with backing sheets showing their designs but the stamps are completely clear.

The advantages of clear stamps is that they are often cheaper than rubber stamps and as they are unmounted they take up less space but they do need a stamping block. Some stamps can discolour over time depending on the inks you use and how quickly you clean them after use but they will still stamp fine and if you look after them they should last a lifetime.  Watch out for cheaper stamps, some may rip as they come off the backing sheet (I have found this with some of the free ones that come with craft magazines).

Acrylic Block or Stamping Block

If you use an unmounted stamp you will need an acrylic block.  They’re sold separately from the stamps. 


 My acrylic blocks are well loved! They are clear when you buy them from the shop. I've inked a stamp so you can see what it looks like when you are stamping.
An acrylic block that’s slightly larger than your stamp is perfect. If the stamp is too big for the mount, you won’t get a good impression.  

As you get into stamping and buy more stamps you’ll need  a variety of mounts to accommodate your different stamp sizes.

I will go into the technique of stamping in a future post.

Card and paper

I wouldn't recommend using copier paper as your image will bleed but it is a good place to practice and try out a new stamp for the first time.

I always use card it's perfect for stamping with any kind of ink pad and being thicker than paper won't get too wet, keeping the image crisp. You can find card stock in a variety of textures, weights and of course colours and patterns.  You can stamp on smooth or textured card stock  with different effects, super smooth card will give it a crisper image whilst textured card stock will affect the stamped image, which you might like and suit your project.

When I use my Promarkers with stamped images I use a super smooth card to get a clean image and alcohol pens don't bleed.  One of my favourites is Sheena Douglass Stamping Card. Sheena is also worth checking out for techniques and inspiration, you can find her YouTube channel here.

Try different types of card and paper and see what you like the best. If you are not getting the results you want it may be the paper or card you are using.

Craft Mat

Not essential to start but you will need to protect your work surface and you can pick up an A4 Cutting Matfor under £5.


Baby wipes

A must have to clean mucky fingers, mats and stamps.  If you don't want to use baby wipes then soap and water will clean most ink off your stamps.  However, solvent inks need a specific cleaner.


Optional....

Sometimes you may find using a foam mat (or a mouse mat) would help to get a better impression from the stamp. I only use one if I am having trouble with getting an even image from a stamp. You may find that if you use a craft mat this is sufficient.

So this is what you need to get started.  My advice is to buy what you can afford to get you started and just play!

Next time I will share my techniques to get the best results from stamping.


You may also like....


http://fizzijaynemakes.blogspot.co.uk/2015/07/fizzijaynes-crafty-tips-to-stamping-1.html
#1 Types of Ink
#3 How To Stamp

Please note: the Amazon links in this post are affiliated.