Showing posts with label #nationalcrochetmonth. Show all posts

Sunday, 27 March 2016

Guest Blogger ~ Standing Stitch Tutorial by Katherine Hajer....

We're nearly at the end of National Craft Month, have you tried any new crafts? 
I hope you have enjoyed all the guests I've had on my blog this month.  For the final instalment, Katherine is back sharing her tutorial on crochet standing stitch.

You can see her foundation stitch tutorial which she shared at the beginning of the month here.

Over to Katherine....
Here’s a situation: you are crocheting something in stripes, and you've got to the point where it’s time to change colours and start the next stripe. If you do things the traditional way, you:
  1. Drop the old yarn at the penultimate step in completing the last stitch on the old row.
  2. Pick up the new yarn and complete the stitch.
  3. Chain however many you need to start the next row.
  4. Turn the work.
Or maybe: you are working on a multi-coloured motif, and have finished off the old colour. Now you’re supposed to attach the new yarn, chain up, and keep working. Except, if you’re like me, that starting chain is always very obvious, and it bothers you.
Here’s an alternative: you could skip both those scenarios and just use a standing stitch.
A standing stitch is a method used to join new yarn to an existing piece of crochet without having to do any of the steps listed above. It also has these additional benefits:
  • The old yarn is fastened off completely before the new yarn is added, so you don’t have to worry about keeping two different yarns under control as you add a new colour.
  • You don’t have to work back and forth. If you want to work right to left for a one-row stripe, then start at the right-hand side again and work right to left again for the next one-row stripe, it’s just as easy as turning the work and going the opposite way.
  • If you’re working in the round, you can stagger your start and stop points each stripe so that you don’t wind up with all your loose ends in one spot. This is very handy on granny squares!
(Note: since this post is being published on a British Web site, British crochet terms are used throughout. Here's a handy list for converting terms.)
If you prefer a video demonstration to written instructions, you can watch this.
What you need before you start: something to crochet onto. Usually this will be a piece of crochet that’s already done. If you are finishing a round/row and then starting a new colour, finish off the old yarn as if you were completing the piece (ie: clip yarn, pull short end through last stitch).
Proceed:
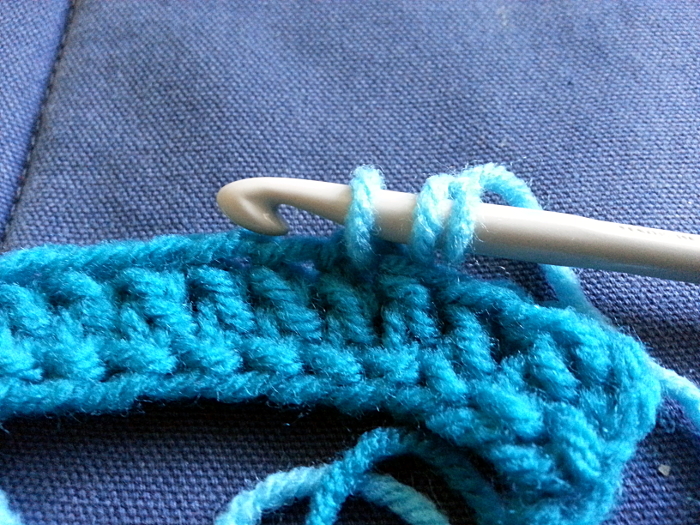
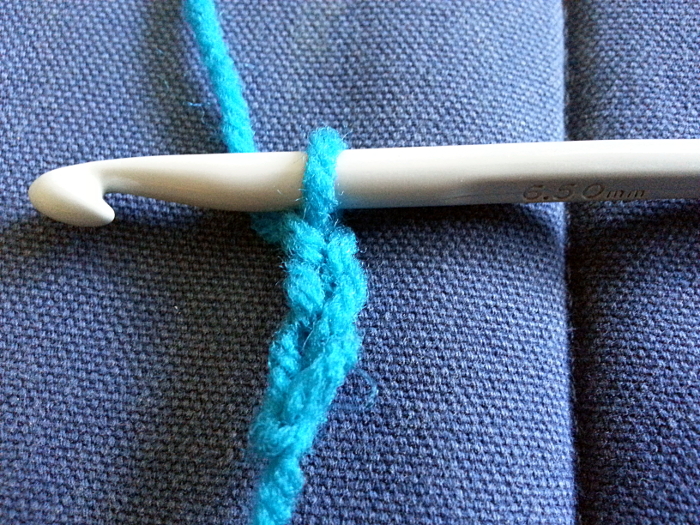
  1. There are different ways of doing this, but you want to have as many loops on your hook as you would have before you inserted your hook for a new stitch mid-row. In the photo below, I'm going to join the new yarn with a treble, so I have two loops on my hook. Crocheters more experienced with the technique often just use a backward loop and a regular yarn over, but if you’re trying this for the first time, I recommend making a slip knot for the first loop so everything stays secure.
    01 standing st starting lp.jpg
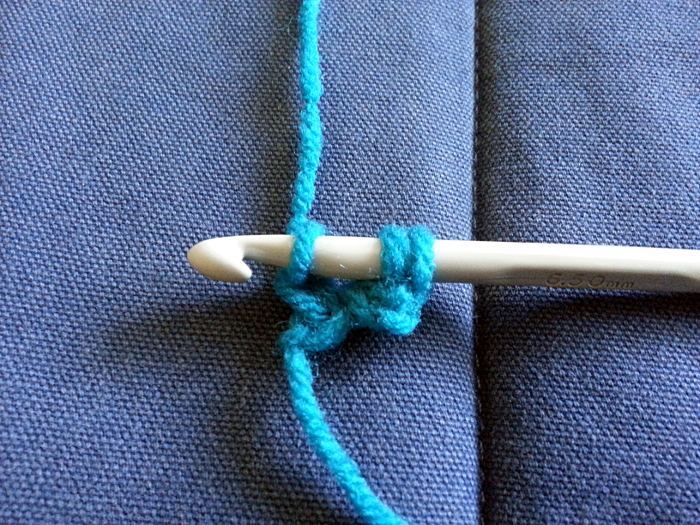
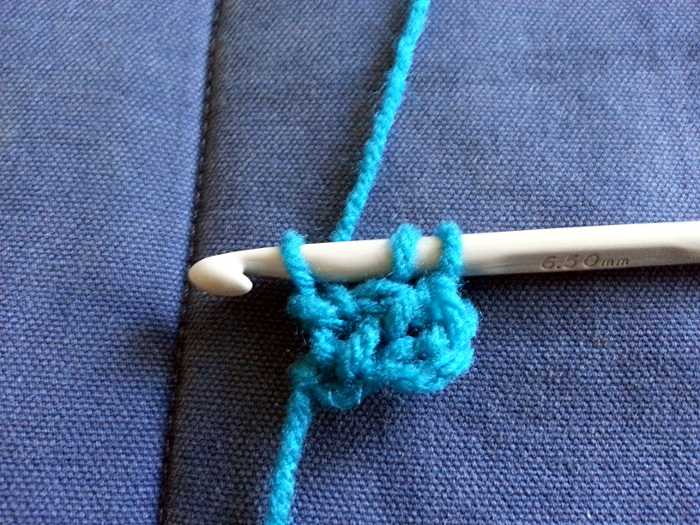
  2. Insert your hook into the work and work a stitch as normal. Once the stitch is complete, the new yarn will be attached to the work and you can work the rest of the round/row as normal.
    02 standing st attach to work.jpg
  3. That’s it! If you did use a slip knot but do not like knots overall, you can pick it open with a tapestry needle when you are finishing your loose ends. Or you can just leave it.
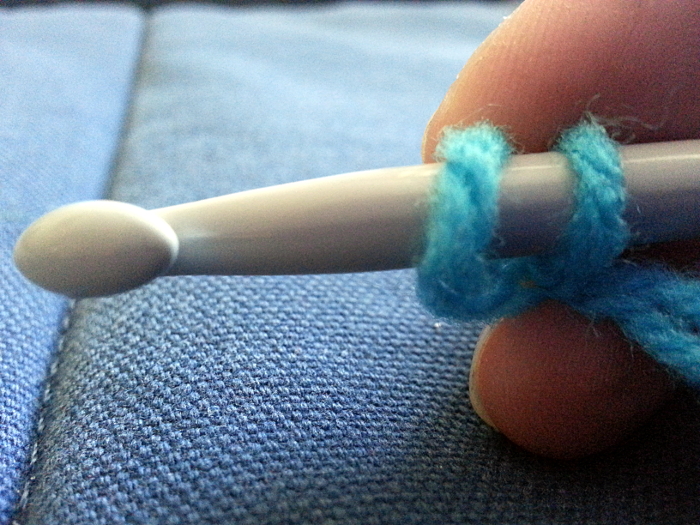
Note that working a standing stitch means the beginning tail of your new yarn will be located at the top of the first stitch in the new yarn, rather than the bottom as it would be using the traditional method. This doesn't make darning in the ends any easier or harder than using the traditional method. It just means you may have to use a slightly different strategy than normal when you’re finishing.
-------

Thank you Katherine for sharing not one but two crochet tutorials on my blog this month! 

Find out more about Katherine over here....
check out her website
find Katherine on Twitter


A big thank you to all my guests who have shared their craft tutorials to help me celebrate National Craft Month. You can see all their tutorials here, including the ones from last year.

I always like to see what you make from the tutorials on my blog. If you make anything I'd love to see them so please tag me in your social media posts or leave your links in the comments below so I can check out your makes.


fizzi~jayne x

Monday, 7 March 2016

Guest blogger ~ foundation crochet tutorial by Katherine Hajer....

Did you know that March is National Craft Month? I couldn't let it go by without celebrating it! Over the next few weeks I have guests taking over my blog to share their favourite craft tutorials and techniques.

National Craft Month is a great excuse to try out a new craft and I hope you will be inspired by the posts I have planned this month. You can check out all the craft tutorials on my blog here. There are different techniques for scrapbooking, stamping, decoupage, Jewellery making as well as crochet.
It's also National Crochet Month so first up I have a crochet tutorial by Katherine who has kindly shared her technique for foundation stitch.
Katherine lives in Canada and is a regular on #CraftBlogClub. Katherine shares her yarn and beading tutorials on her website.  Katherine also writes fiction, mostly on her blog but some of it has been published in literary magazines as well.  She says, "If I'm not writing or reading, I'm probably doing something with stringy stuff, and possibly with beads as well".

Over to Katherine.......
The great thing about crafting is that there's at least one alternative technique for every standard. And the more techniques you know, the better you can choose the one that's best for the situation at hand!
This tutorial focuses on foundation crochet stitches. Foundation crochet creates the first row of a crocheted piece without having to make a foundation chain to start. It is smoothly finished on both the top and bottom edges, and has the same amount of “give” as the rest of the fabric (no pulling in or fanning out!).
If you: make foundation chains which are much tighter or looser than the rest of your work;
Or you: are making a crocheted piece with a lot of starting stitches, like a blanket or a coat;
Or you: really, really hate that first row of working through chain after chain;
Then you will want to know about foundation crochet!
And if you: hate written instructions, here’s a video demonstration I found.
(Note: since this post is being published on a British Web site, British crochet terms are used throughout. Here's a handy list for converting terms.)
The basic formula:
  1. Chain 1 to work the first stitch, plus however many chains you would normally work at the start of a row with that stitch. For example, if you are starting with a double crochet, chain 2 (base chain plus start-of-row chain); for a foundation treble crochet, chain 4 (base chain plus chain-3 starting stitch). If the stitch you are using counts the starting chain as the first stitch, that rule still holds.
    01 fnd crochet starting ch.jpg
  2. Start to make a stitch in the chain farthest from the hook, but instead of working “yarn over (yo), pull yarn through 2 loops on hook” as the first part of forming the stitch, work “yo, pull yarn through 1 loop on hook” first. This forms the chain for the next foundation stitch.
    03 fnd crochet make the next chain.jpg
  3. Work the stitch as normal — in this case, yo, pull yarn through two loops, yo, pull yarn through two loops (foundation treble made).
  4. Look at the bottom of the last stitch. You will see a V-shaped loop, similar to the loops which appear at the top of a row of crochet. Insert your hook into this loop and work the next stitch the same as the previous one, working a “yo, pull yarn through 1 loop” before forming the next stitch. Keep forming one loop before working the stitch and inserting the hook into the bottom “V” to form the next stitch until the row is as wide as you need it to be.
    04 fnd crochet ch in bottom fnd st.jpg
Tips and tricks:
  1. Foundation crocheted rows do not have to be all the same stitch! You are free to mix double, half-treble, treble, or whatever height stitches into your foundation crochet row, just as you might with the foundation chain method.
  2. If you need to work multiple stitches into the same chain at the start of a row (for the heel of a slipper sole, for example), work all stitches in the group but the last one as regular stitches, and then work the last stitch as foundation crochet.
  3. If you need to work multiple stitches into the same stitch at the end of a row (for the toe of a slipper sole, for example), work a foundation crochet stitch first, then work the rest of the stitches in the group as regular stitches, all worked into the foundation stitch’s bottom V-loop.
  4. If you are working an oval shape (to start a rug, for example), foundation crochet across the first half of the round, then work regular crochet into the bottom Vs of the stitches to form the second half of the round. This is the equivalent of working into the top loops of a chain and then the bottom loops.
Stitch tops are just the same as “regular” stitches”:
05 fnd crochet st tops.jpg
Stitch bottoms look like the stitch tops, but the Vs run in the opposite direction:
06 fnd crochet st bottoms.jpg

Thank you Katherine for a great tutorial. I hope you have found this useful. If you are new to crochet you can check out my tips for beginners here and Katherine will be popping up again later this month to share a tutorial on standing stitch.

In the meantime you can find out more about Katherine over here....
check out her website
find Katherine on Twitter

fizzi~jayne x

Friday, 20 March 2015

Guest Post ~ What is Blocking? by Sally Strawberry....

I have another guest for you to celebrate National Craft Month and this time it is Sally Strawberry! (Strawberry is her blog surname but it would be really cool if it was her real one!).

I follow Sally's blog which is full of crochet scrumptiousness (is that a real word? If not it should be) and has given me helpful tips whilst I learnt to crochet.  Sally's patterns have also been included in "Inside Crochet" magazine which is pretty cool! 

So I am really pleased that she is sharing her expertise on my blog, over to Sally....


Hi, I'm Sally and I have just a little obsession with crochet. I love the flexibility of crochet, the way that with just a few stitches you can create something beautiful.

I began with knitting but my real passion is crochet. I believe that crochet should no longer be seen as an activity purely for the older generations but should be used as an expression of creativity and to show off the multitude of fabulous yarns we are privileged to have available to us (the brighter the colours the better!). 

I'm a scientist by trade and work full-time but snatch as much time as possible to crochet, blog and immerse myself in the fabulous world of craft. 

What is blocking? 

Blocking is one of the most important steps in any knitting or crochet project to take your work to the next level, to make them look as brilliant as they do in the magazines.
Blocking comes in many guises, but essentially has the same effect. 

Joanne of Not So Granny writes about wet blocking by giving your item a good soaking. This is the most suitable method for those beautiful garments you have lovingly crocheted in sumptuous wool yarns.  

Lucy of Attic 24 has posted about 'steam blocking' whereby small items, such as bunting, are blocked by hovering a steam iron over your work which is firstly pinned into position. My method is a mix of the two, and I will go through it now.....

In this tutorial I will only be talking about blocking small items such as bunting, as although I do now blog about my larger crochet and knitted pieces, I'm by no means an expert (I’ll leave that to Joanne).  

Now although I’d never claim to be an expert in anything, I have made a lot of bunting over the years. A lot! Bunting really benefits from blocking, as it looks miles better hanging and is less likely to curl up at the corners. Bunting also benefits from being a bit sturdy, so hereby I introduce the secret ingredient- spray starch!

Right, here goes…..

See these triangles of crochet fabulousness here.....sorry....I mean strange shapes all curled up at the corners.....these are my bunting triangle pre-blocking....


The kit....

  • Damp tea towel (I put it under the tap and wring it out well)
  • An iron (any old iron- mine doesn't even steam anymore)
  • Pins
  • and the magic ingredient- SPRAY STARCH (only a quid in the laundry aisle of any supermarket)
The process....

1. Place item front side down onto ironing board
2. Spray liberally with spray starch
3. Make sure it is flat and cover with damp tea towel
4. With iron on a LOW SETTING (very important!) press firmly onto work through the tea towel


It is very important that you don't hold the iron down very long, 5 seconds at a time max, otherwise you risk squashing/melting your work, especially if you are using acrylic. 

Keep on pressing until your work stays flat when you remove the tea towel, but please please please not long enough to burn it.

5. Turn work over so that the right side is facing up
6. Spray the front liberally with starch
7. Pin into place stretching out the corners. I just do this straight into the ironing board foam.


8. Leave to dry overnight
9. Voilà! Lovely flat, slightly stiffened, triangles ready to be strung into bunting!


See the difference yes? 

The advantages of blocking are really obvious.....so no excuses eh!

P.S. When I am blocking component parts of a stuffed toy for example I just iron lightly on reverse through a damp tea towel.  Starch wouldn't be appropriate in this case. The pieces are then OK to be used straight away!

Thank you Sally for taking the time to share this tutorial with us, this is really useful. I haven't really known what I was doing with blocking so I am grateful for the tips!

Check out Sally's blog for more crochet tips, patterns and tutorials here
Sally is also on Twitter, Facebook and Instagram.

I hope you have enjoyed my guest bloggers for National Craft Month. I don't just have guests in March, I'm always happy to work with other crafters and bloggers so if you have an idea or craft tutorial you would like to share, please get in touch.


fizzi~jayne x

Have you missed the other guest posts this month? Click on the links below....

Rachel Saka - Decoupage Techniques

http://fizzijaynemakes.blogspot.co.uk/2015/03/guest-post-spiral-earrings-tutorial.html
Spiral Earrings Techniques


Monday, 24 March 2014

Learning to Crochet....

Not only is it National Craft Month but it is also National Crochet Month!
 
For 2014 I wanted to learn a new craft and I fancied having a go at Crochet. 
 
My mum taught me to knit when I was young but I never took to it and focused on sewing, art and other crafts instead.  

Learning crochet has ignited a passion for yarn and yep I am now officially hooked (excuse the pun)!!

It was frustrating at first and I thought I would never get my head around it.  It is a different way to craft for me as it is following a pattern whereas I like to experiment and play, more freestyle crafting.  However, this makes it the perfect hobby because I am focusing my mind on something different but it is still creative.  I am pleased to say I am now thoroughly enjoying it and I am finding it relaxing, until I lose count!

My first completed project using Afghan Stitch, was a cover for my iPad. I even worked out the pattern myself!

I used 2 colours, this side is Pink with a Lilac stitch across the top and along 2 sides when stitching together.

The other side is Lilac with Pink stitching around 2 edges when sewing the 2 sides together
 
It's not perfect but I am proud of my first attempt and I am using it, it keeps my iPad nice and cosy and safe from key scratches in my handbag.
 

It isn't helping me be a savvy crafter as I am not only buying yarn but also books and magazines but if you read my last post you will know this now has to stop!  I'm loving Simply Crochet right now, as it has great patterns and newbie techniques. I will buy one as a treat every now and then but I will make more use of the wealth of FREE info on the web. I have been adding free patterns and tutorials to my Pinterest board.

I am pleased I bought the Crochet Compendium as it is a great reference book and has helped me to understand patterns as well as basic techniques.


The patterns for this flower and leaf were found on Pinterest and are now saved on my Learning to Crochet board....


Now I have yarn in my life I have also started to make Pom Poms! I had forgotten the childhood joy of making Pom Poms until reading Anthea's fab blog post about Crafty Obsessions. So I am now in the process of making Easter chicks
fizzi~jayne  x