
We're nearly at the end of National Craft Month, have you tried any new crafts?
I hope you have enjoyed all the guests I've had on my blog this month. For the final instalment, Katherine is back sharing her tutorial on crochet standing stitch.
You can see her foundation stitch tutorial which she shared at the beginning of the month here.
Over to Katherine....
I hope you have enjoyed all the guests I've had on my blog this month. For the final instalment, Katherine is back sharing her tutorial on crochet standing stitch.
You can see her foundation stitch tutorial which she shared at the beginning of the month here.
Over to Katherine....
Here’s a situation: you are crocheting something in stripes, and you've got to the point where it’s time to change colours and start the next stripe. If you do things the traditional way, you:
- Drop the old yarn at the penultimate step in completing the last stitch on the old row.
- Pick up the new yarn and complete the stitch.
- Chain however many you need to start the next row.
- Turn the work.
Or maybe: you are working on a multi-coloured motif, and have finished off the old colour. Now you’re supposed to attach the new yarn, chain up, and keep working. Except, if you’re like me, that starting chain is always very obvious, and it bothers you.
Here’s an alternative: you could skip both those scenarios and just use a standing stitch.
A standing stitch is a method used to join new yarn to an existing piece of crochet without having to do any of the steps listed above. It also has these additional benefits:
- The old yarn is fastened off completely before the new yarn is added, so you don’t have to worry about keeping two different yarns under control as you add a new colour.
- You don’t have to work back and forth. If you want to work right to left for a one-row stripe, then start at the right-hand side again and work right to left again for the next one-row stripe, it’s just as easy as turning the work and going the opposite way.
- If you’re working in the round, you can stagger your start and stop points each stripe so that you don’t wind up with all your loose ends in one spot. This is very handy on granny squares!
(Note: since this post is being published on a British Web site, British crochet terms are used throughout. Here's a handy list for converting terms.)
If you prefer a video demonstration to written instructions, you can watch this.
What you need before you start: something to crochet onto. Usually this will be a piece of crochet that’s already done. If you are finishing a round/row and then starting a new colour, finish off the old yarn as if you were completing the piece (ie: clip yarn, pull short end through last stitch).
Proceed:
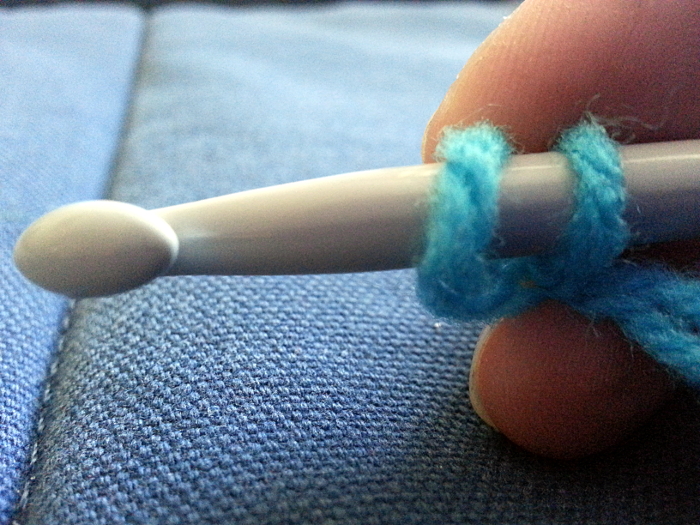
- There are different ways of doing this, but you want to have as many loops on your hook as you would have before you inserted your hook for a new stitch mid-row. In the photo below, I'm going to join the new yarn with a treble, so I have two loops on my hook. Crocheters more experienced with the technique often just use a backward loop and a regular yarn over, but if you’re trying this for the first time, I recommend making a slip knot for the first loop so everything stays secure.
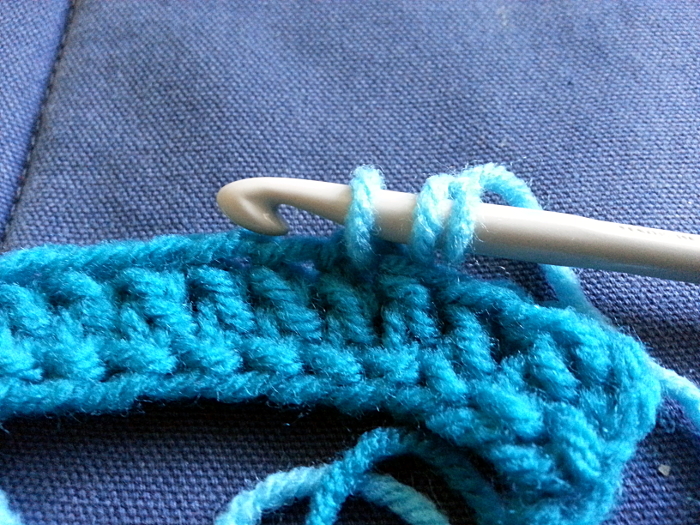
- Insert your hook into the work and work a stitch as normal. Once the stitch is complete, the new yarn will be attached to the work and you can work the rest of the round/row as normal.
- That’s it! If you did use a slip knot but do not like knots overall, you can pick it open with a tapestry needle when you are finishing your loose ends. Or you can just leave it.

-------
Thank you Katherine for sharing not one but two crochet tutorials on my blog this month!
Find out more about Katherine over here....
check out her website
find Katherine on Twitter
A big thank you to all my guests who have shared their craft tutorials to help me celebrate National Craft Month. You can see all their tutorials here, including the ones from last year.
I always like to see what you make from the tutorials on my blog. If you make anything I'd love to see them so please tag me in your social media posts or leave your links in the comments below so I can check out your makes.
fizzi~jayne x
No comments:
Post a Comment
Thank you for leaving a comment! I love to hear from you, whether you just pop by to say hi, share your experiences or want to give me feedback. I appreciate your comments and love reading them.