Showing posts with label project. Show all posts

Tuesday, 4 March 2014

#craftblogclub Challenge ~ Re-Loved....

....I Re-Love You!

Every Tuesday at 7pm #craftbloclub brings together craft bloggers, lovers of craft blogs and craft.  Emma, the founder of #craftbloclub, sets us monthly challenges to get our crafty teeth into.  You have to check out her blog and her beautiful Re-Loved project here .

February's #craftblogclub challenge is all about upcycling and bringing new life to something for the home. 

I have done something small and simple but something I wanted to do.  Everyday I sit at my desk and see this....


My pen pot is a Cheese Football tin! I don't even like them, they are my hubby's Christmas snack of choice.  It is practical but ugly.  So I turned it into this....

Much prettier!


I did this using the technique best known as Decoupage.  I've only done this once before on Christmas decorations and I loved the effect. 

I used....
Deco Mache paper
Washi tape
Buttons
White Gesso paint
White Acrylic Paint
Tacky PVA Glue

How did I do it....

1. First of all I wanted to reduce the height so I could see what I have in the tin, so I measured 12cm around except for at the front where it is 11cm to give it a nice shape.


When using the Stanley knife I scored before cutting to ensure accuracy and so I was less likely to slip!  I also cut on a non slip mat, (I used my embossing mat) which meant it was easier to control and my fingers and wrists were still intact.  I sanded down any rough bits.

2. I primed the pot with white gesso paint and then painted a couple of coats of white acrylic paint to ensure the Cheesy Footballs could not be seen. If I was using thicker paper I would not necessarily need to use the acrylic paint but as Deco Mache paper is thin I needed to do this.

All prepped and ready to go

3. I used 2 different papers and cut them into random squares and rectangles.  For a different look you can just tear.

Now I am ready to Decoupage!

4. Using a brush I spread PVA glue on to the pot. I used the same brush to pick up and position each piece of paper onto the surface at random.  Each time I added more glue on top of the paper to fix it in position.

and then it looks like this....


5. Now, I could have stopped there, but that's not me I decided to get a dry brush and painted strokes of white gesso paint over the paper in random areas of the pot....

The paint gives it a distress look

I used Gesso instead of acrylic paint which is thicker and more opaque so the papers can still be seen. The trick is also not to over load the brush.

6. I could have also stopped here but then I found some Washi tape that would go perfectly with the papers so added strips and covered in PVA glue over the top to give it the same gloss finish as the rest of the pot.


7. I did varnish with Decopatch Aquapro Professional Varnish to make it water resistant and to give the colours longevity.

8. Now I really didn't need to do anymore but I love buttons so added a few small ones. So the final product looks like this....


What do you think?

I love the colours, they bring a bit of spring into my craft den and the aqua chevron is very on trend!

This is an easy and a relaxing technique, I don't know why I haven't done more of it before.  It is ideal for using up scraps of paper or fabric.

It is also addictive, I couldn't stop, I even decoupaged a draw from my craft den....

I did exactly the same except I skipped the white acrylic paint and I also used my distress inks. I inked around the edge with Mustard Yellow and Vintage Photo colours.

This drawer belongs to a set from Ikea I got a few years ago and I have been meaning to decorate them, the question is do I decorate all the draws the same or all differently??


What do you think, all the same or mix it up?

I now have the upcycling bug and looking around the house for a project, I think it will be our bedside tables next....

I will be hosting #craftblogclub on 11th March at 7pm, I hope you can pop along for a chat


fizzi~jayne  x

Thursday, 6 February 2014

Project ~ Love is in the air....

This year I wanted to share some of my favourite crafty techniques and projects.  As I was thinking what to share first, an opportunity came up to feature products that I use from one of my favourite craft suppliers, Handy Hippo.  I have used Handy Hippo for a couple of years now so it was an easy decision to write this post. Although it is a sponsored post all my views, images and techniques are my own.

As it is nearly Valentine's Day I thought I would share the Valentine's card and gift box in one I have made....


How did I do it....

I used my trusty guillotine (a must have in my Craft Den) to trim A4 Pearlescent card to 14x28cm.  The colour is a pretty pink and the light reflects different shades off the pearlescent finish.


The card was folding in half and folding one half in half again to make it an easel card.


The stopper to make the card stand up as an easel was made by stamping the sentiment from the Wild Rose Vintage Heart stamp set " you have stolen my heart". This set has such a romantic feel and co-ordinates with other stamps I have from their range.


Wild Rose Studio, Vintage Heart Clear Stamp Set
I stamped on to the pearlescent card in peony coloured ink and used clear embossing powder to give it a slightly raised and shiny effect.   This was mounted onto silver mirror card for a border and attached to the card with a 3D foam pad to create a stopper.


I used the Spellbinders Nestabilities Die, Wavy Rectangles on white card to write a personal message.  I used Distress Ink in Tattered Rose to give it a blush look


I love creating my own background designs on plain card.  For this project I stamped the heart from the Wild Rose Vintage Rose stamp set in 2 colours randomly, peony and lilac, then highlighted areas with iridescent glitter. 

I stamped twice before re-inking to give a shadow/paler impression giving the design more depth.


I stamped the same design on to the sides of the box

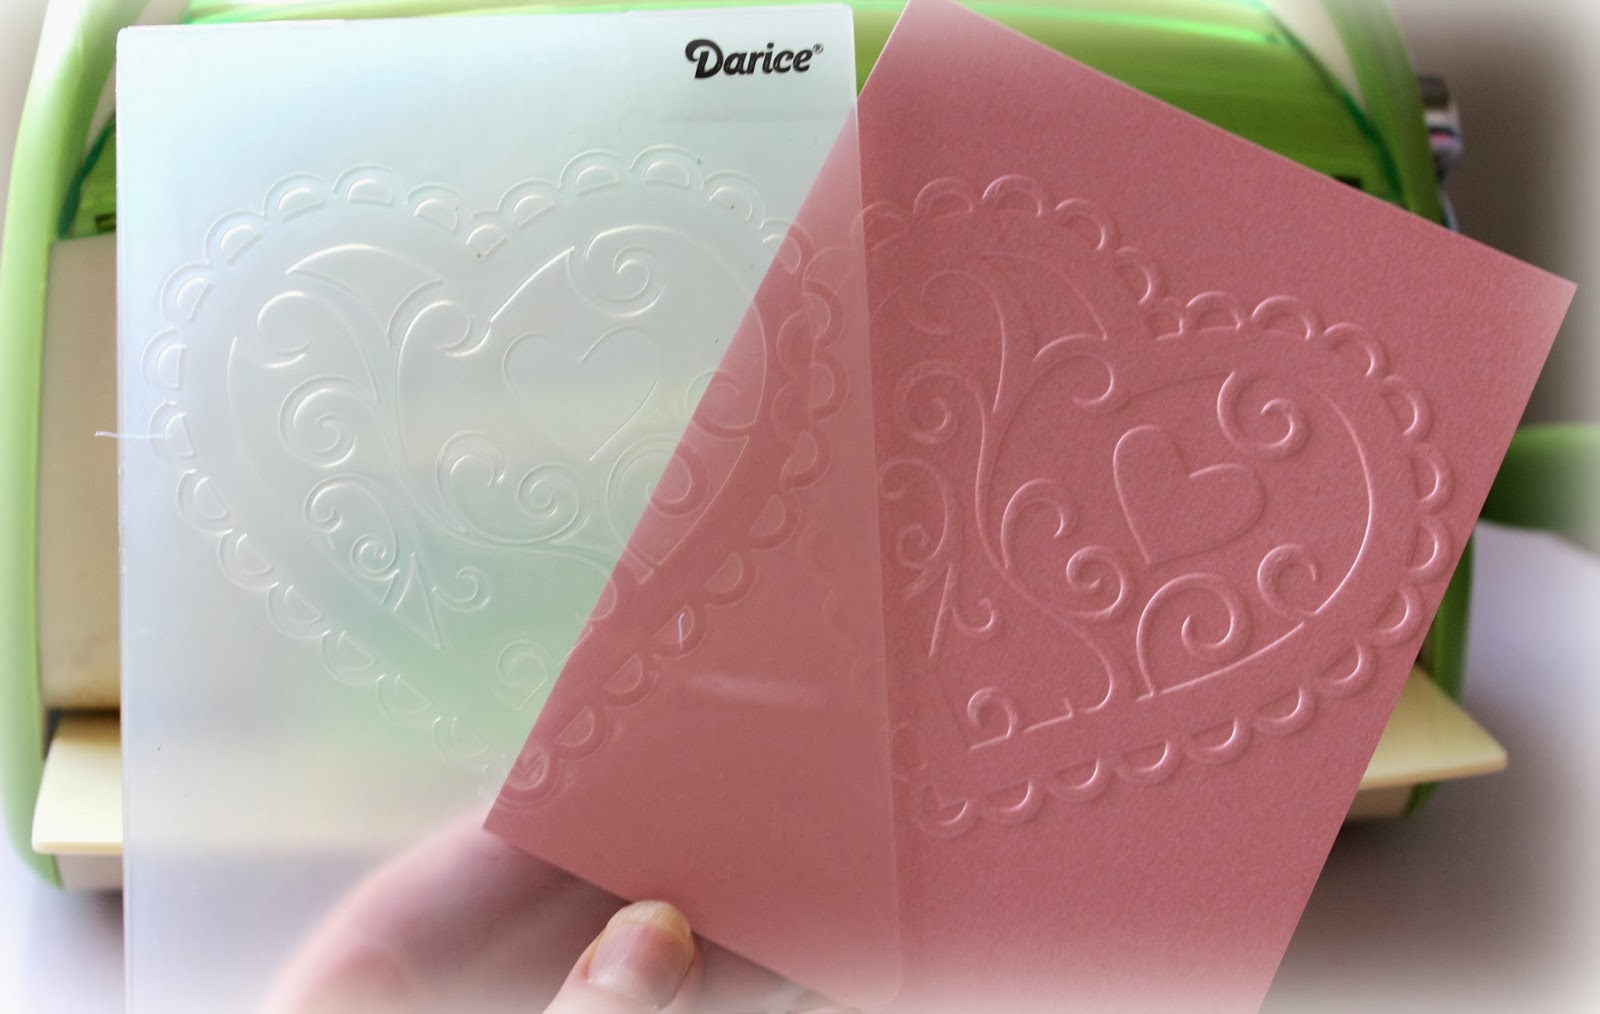
I am a big fan of embossing folders, I have a drawer full and when I think I possibly can't need anymore I see ones like this Darice Valentine's Heart.  I used the pearlescent card again to emboss this design and cut it out the heart, cutting off the scalloped edge. I embossed the heart again using American Crafts textured card in Blossom, I cut this out so when I glued the pearlescent heart on top of the textured card the scalloped edge of the blossom can be seen. 


Darice Valentine's Heart Embossing Folder


I use a Cuttlebug (aka Colin!) for my embossing and die cutting

I love the metallic sheen effect gilding wax gives to an embossed or textured design, I used Cosmic Shimmer 
Golden Lilac Gilding Wax over the embossed heart.


I used the same heart stamp on white card and I cut this out and glued to the small heart of the embossed design. I used the same technique to embellish the drawer to the box.

I had a scalloped heart in silver mirror card in my crafty stash which made the topper pop.


The gift box was made to have a drawer to fit a small gift , measuring 14x14x3cm, perfect size for yummy chocolates or jewellery (I can but only hope!).

 
It is best to use wet glue to make a box, I use pegs to hold the shape whilst the glue dries.
To be able to pull the drawer out I punched a hole and threaded silver ribbon.


I hope you liked my first crafty technique post, what do you think?


What I used

From Handy Hippo....
Darice Embossing Folder, Valentine's Heart
American Crafts 12x12 Textured Cardstock - Blossom
A4 Pearlescent Card by Centura Pearl - Fresh Pink
Wild Rose Studio Clear Stamp Set, Vintage Heart
Finger Lift Tape
Silver Narrow Ribbon
Inspire Me Card Snow White
Creative Expressions Gilding Wax, Golden Lilac
Spellbinders Nestabilities Die, Wavy Rectangles

From my crafty stash....
Silver Mirror Card
Various colour ink pads
Wet Glue
Pearl effect embellishments
3D Foam Pads
Clear embossing powder
Distress Ink
Glitter

This tutorial is for non-commercial use only. You can use it to make as many cards for yourself, gifts or to raise funds for a charity but please don't make any to sell for profit.

If you want to blog about this project, remember to credit me and link back to this page on my blog. Please ask permission before using my photography and please do not reproduce my entire tutorial on your site.  Thank you