Monday, 14 March 2016

New Year Crafty Resolution ~ Calligraphy....

I launched a new #CraftBlogClub challenge back in January and the topic was simple, to learn a new craft or technique.  A perfect excuse to get out the beautiful calligraphy starter kit that my lovely friend Sarah gave me for my birthday and make a start on my crafty resolution.


I also have this book that I bought a while ago to help me get started.


So here are my first attempts at calligraphy....

Using the book I followed the advice of making different pen strokes first.


I kept smudging the ink.  It can take a while to dry especially if you make thick lines.


Using the guide that came with the kit, I traced the letters to practice writing them individually and then I traced my name.


Here it is freehand underneath.


Once I had finished the paper that came with the kit I bought a calligraphy pad.  I did try using a layout pad but the ink bled.  The calligraphy paper is beautiful, it's like the old fashioned parchment paper, I feel like I should be writing important letters or thoughtful poetry with it!

I started to practice more freehand using the book for guidance.


I started to feel comfortable and started to write words, without drawing guide lines first, I know I'm a maverick!


I haven't got a finished piece, but that's not what the challenge is about, I'll keep practising and keep posting updates on my progress.


Have you started a new craft this year? I can't wait to see what everyone has created and how you have got on with this challenge.  If you have written a blog post please add the link to the linky below so everyone can have a look, this is the fun bit of the challenge, seeing what you have all made. Don't worry if you haven't posted it yet, the linky will be open for the next 3 weeks.

In tomorrow night's #CraftBlogClub chat we'll be talking about this challenge and sharing photos of what we have done. I hope you will join us at 7pm (GMT, 15th March) over on Twitter, it doesn't matter if you haven't joined us before, we are a friendly bunch and welcome new crafters every week.

fizzi~jayne x

Friday, 11 March 2016

Spring Knitting and Stitching Show 2016....

Last weekend I went to the Knitting and Stitching show with my #CraftBlogClub co-host Katie. We were kindly given the tickets by the organiser. We don't get to meet up that often, as we live at the opposite ends of the UK, so it was a great opportunity to catch up and plan the year ahead. I won't spoil it by going into too much detail but we are very excited about the guest hosts and fun challenges we are planning, plus we were chatting about other exciting ideas but I won't say any more, you'll have to watch this space!....

Back to the show! I was looking forward to being inspired and it was hard not to be when you are surrounded by beautiful yarn and fabric. I managed to keep control over my spending but I am still obsessing about some flamingo fabric I saw on Maud's Fabric Finds stand. She had colourful, quirky fabric but at £16 per metre I resisted but it's so pretty, you have to check it out!

My purchases
I couldn't leave without buying yarn and I love these colours .  They had a sample made up and it looked so bright and cheery.  I'm thinking I might make my niece a beanie hat or use it for an amigurumi animal, 200g might be enough for both.

I bought a pattern for a summer dress to make for myself (hopefully in a flamingo printed fabric!).  I also want to use the pattern paper for a crafty project so I am going to need to trace it first.

There were a few beading / jewellery making stalls and I managed to pick up some charms for the beaded snowflakes I make to sell at Christmas (I know I said the "C" word in March!).

My favourite purchase only cost £1.75! I found needles for knitters, which means when I am threading in my loose ends on a crochet project I won't have to struggle trying to thread the yarn into a standard darning needle, yay!

Here are some pics from the show....


It was great to have the chance to meet one of our #CraftBlogClub guest hosts, Jenniffer Taylor from the Great British Sewing Bee and now a Create and Craft TV expert.


The show organised a knitted feast competition and the entries were fab...


There was also a display of the National Fashion and Textile Competition by A-Level students. The standard was amazing!  The garments were so imaginative and of a high standard....


Jane was one of our #CraftBlogClub winners of the ticket giveaway and she kindly let me use a few of her photos....

I saw this dress too and there are embellishments made from paper.

This was made from a Gazebo!
There was an exhibition area for textile artists to display their inspiring work


Thanks Jane for letting me share your photos. You can check out Jane's Twitter feed where she shared more of her photos there.

Kay was another #CraftBlogClub winner and she has written a post about her day on her blog, check it out here.

Did you go to the show? if you blogged about it or shared pictures on social media, leave your links in the comments so I can have a look.  

If you have never been to the show and love yarn/ fabric/ haberdashery it is well worth a visit.  It's not just on in London but various cities in the UK and Ireland.

fizzi~jayne x

The organisers of the Spring Knitting and Stitching Show kindly gave myself and Katie the tickets for free. All the views and opinions expressed are my own and I have not been paid for this post.

Monday, 7 March 2016

Guest blogger ~ foundation crochet tutorial by Katherine Hajer....

Did you know that March is National Craft Month? I couldn't let it go by without celebrating it! Over the next few weeks I have guests taking over my blog to share their favourite craft tutorials and techniques.

National Craft Month is a great excuse to try out a new craft and I hope you will be inspired by the posts I have planned this month. You can check out all the craft tutorials on my blog here. There are different techniques for scrapbooking, stamping, decoupage, Jewellery making as well as crochet.
It's also National Crochet Month so first up I have a crochet tutorial by Katherine who has kindly shared her technique for foundation stitch.
Katherine lives in Canada and is a regular on #CraftBlogClub. Katherine shares her yarn and beading tutorials on her website.  Katherine also writes fiction, mostly on her blog but some of it has been published in literary magazines as well.  She says, "If I'm not writing or reading, I'm probably doing something with stringy stuff, and possibly with beads as well".

Over to Katherine.......
The great thing about crafting is that there's at least one alternative technique for every standard. And the more techniques you know, the better you can choose the one that's best for the situation at hand!
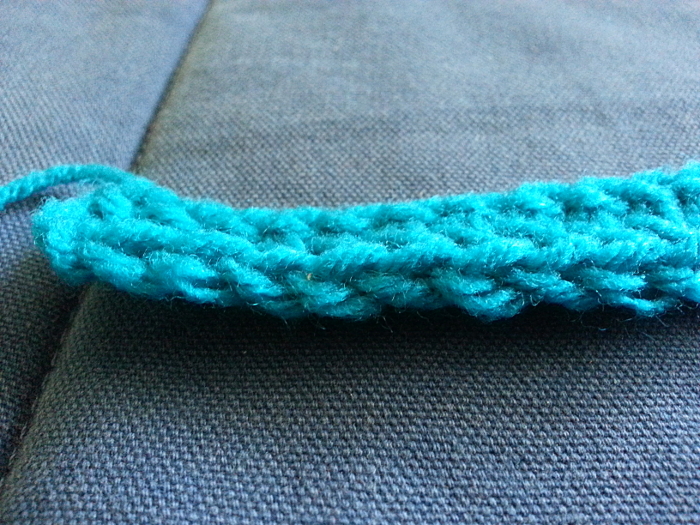
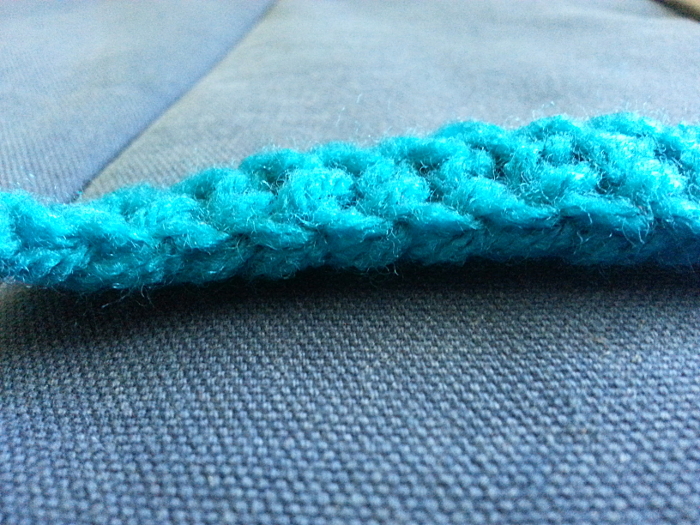
This tutorial focuses on foundation crochet stitches. Foundation crochet creates the first row of a crocheted piece without having to make a foundation chain to start. It is smoothly finished on both the top and bottom edges, and has the same amount of “give” as the rest of the fabric (no pulling in or fanning out!).
If you: make foundation chains which are much tighter or looser than the rest of your work;
Or you: are making a crocheted piece with a lot of starting stitches, like a blanket or a coat;
Or you: really, really hate that first row of working through chain after chain;
Then you will want to know about foundation crochet!
And if you: hate written instructions, here’s a video demonstration I found.
(Note: since this post is being published on a British Web site, British crochet terms are used throughout. Here's a handy list for converting terms.)
The basic formula:
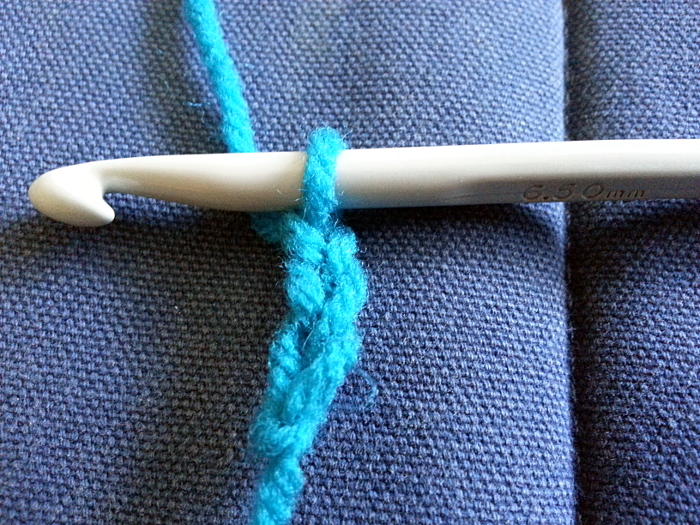
  1. Chain 1 to work the first stitch, plus however many chains you would normally work at the start of a row with that stitch. For example, if you are starting with a double crochet, chain 2 (base chain plus start-of-row chain); for a foundation treble crochet, chain 4 (base chain plus chain-3 starting stitch). If the stitch you are using counts the starting chain as the first stitch, that rule still holds.
    01 fnd crochet starting ch.jpg
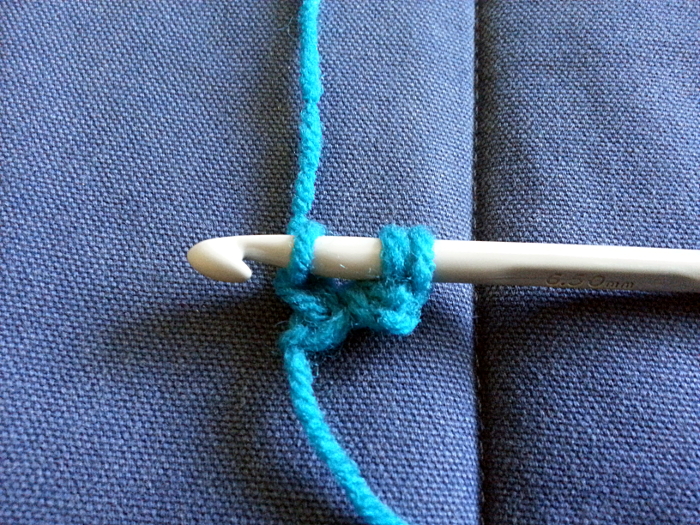
  2. Start to make a stitch in the chain farthest from the hook, but instead of working “yarn over (yo), pull yarn through 2 loops on hook” as the first part of forming the stitch, work “yo, pull yarn through 1 loop on hook” first. This forms the chain for the next foundation stitch.
    03 fnd crochet make the next chain.jpg
  3. Work the stitch as normal — in this case, yo, pull yarn through two loops, yo, pull yarn through two loops (foundation treble made).
  4. Look at the bottom of the last stitch. You will see a V-shaped loop, similar to the loops which appear at the top of a row of crochet. Insert your hook into this loop and work the next stitch the same as the previous one, working a “yo, pull yarn through 1 loop” before forming the next stitch. Keep forming one loop before working the stitch and inserting the hook into the bottom “V” to form the next stitch until the row is as wide as you need it to be.
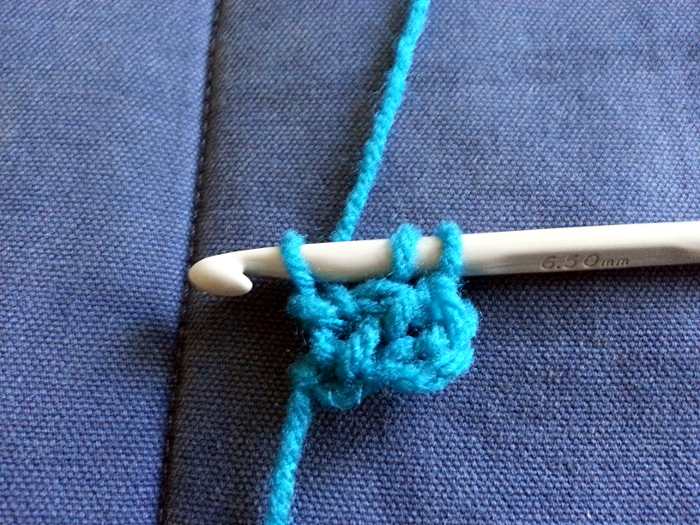
    04 fnd crochet ch in bottom fnd st.jpg
Tips and tricks:
  1. Foundation crocheted rows do not have to be all the same stitch! You are free to mix double, half-treble, treble, or whatever height stitches into your foundation crochet row, just as you might with the foundation chain method.
  2. If you need to work multiple stitches into the same chain at the start of a row (for the heel of a slipper sole, for example), work all stitches in the group but the last one as regular stitches, and then work the last stitch as foundation crochet.
  3. If you need to work multiple stitches into the same stitch at the end of a row (for the toe of a slipper sole, for example), work a foundation crochet stitch first, then work the rest of the stitches in the group as regular stitches, all worked into the foundation stitch’s bottom V-loop.
  4. If you are working an oval shape (to start a rug, for example), foundation crochet across the first half of the round, then work regular crochet into the bottom Vs of the stitches to form the second half of the round. This is the equivalent of working into the top loops of a chain and then the bottom loops.
Stitch tops are just the same as “regular” stitches”:
05 fnd crochet st tops.jpg
Stitch bottoms look like the stitch tops, but the Vs run in the opposite direction:
06 fnd crochet st bottoms.jpg

Thank you Katherine for a great tutorial. I hope you have found this useful. If you are new to crochet you can check out my tips for beginners here and Katherine will be popping up again later this month to share a tutorial on standing stitch.

In the meantime you can find out more about Katherine over here....
check out her website
find Katherine on Twitter

fizzi~jayne x

Monday, 29 February 2016

Cards by a very young fizzi~jayne....

My Mum was having a clear out and came across a couple of cards that I made her when I was young.  With Mother's Day coming up this weekend I thought I would share them with you, have a giggle at these....

It looks like I was after a cat. I never got one!

I remember getting a flower pressing kit for a gift and I used this for the flower

and inside I constructed a pop up trophy! Not sure about the dodgy looking handwriting though, eek! 
I like to think that my cards and creative skills have improved!

My ambitions to start my own company must have started early, look at the "branding" on the back of the cards....


I didn't know my Mum had kept them. It has been fun to look back and the memories they have sparked, thanks Mum x

fizzi~jayne x

Pssst... If you still need to get something for your Mum for Mother's Day, the last date to order from my shop is 1st March 2016.

Friday, 19 February 2016

A day out of the craft den ~ Liberty in Fashion....

Last week I had a day out of the craft den to catch up with Laura from Bugs and Fishes to see the Liberty in Fashion exhibit at the Fashion and Textile Museum.

It was so interesting to see the prints and styles over the decades and I was pleased I could take pictures to show you....


The garments were beautifully displayed in front of impressive prints and artwork.


I loved these peacock feathers they used for this display, they were real and looked stunning.
I was drawn to the bold prints and colours.

I would so wear this dress!

It was lovely to see the sketches and mood boards used by Liberty....


There is also a display on  "The Art of  Pattern" showing the Liberty textile collections by Susan Collier and Sarah Campbell 


This beautiful, old Singer was in the shop, look how prettily it is displayed!

The exhibit is on until th 28th February 2016 so there is still time to see it.  I also recommend the cafe, the choice of cakes are amazing (I may have had one for breakfast!).

Afterwards we jumped on the tube to the V&A's Childhood Museum in Bethnal Green which I have never been to.  First stop was of course the cafe, which has a fizzi~jayne tick of approval!

It was a lot of fun to wander around and look at all the old toys, especially the ones I played with during my childhood, it's strange to think they are in a museum.  I'm not that old, the museum celebrates everything to do with childhood from across the decades and include items as recent as Harry Potter.  Everything was behind glass so it was hard to get great photos but who remembers these craft kits....

I don't think the one I had was called Nancy but I definitely had a French knitting spool like this


and check out these children's sewing machines....


The Museum of Childhood is free and it is well worth a visit.  They currently have an exhibition about Britain's Child Migrants which was really interesting but very moving and we needed some cheering up after that so we went back to the cafe for some cake (yes it was my second serving of cake of the day but who's counting!).

They have an exhibition of Bagpuss and the Clangers from 19th March 2016, so I hope to be able to go back to see that.

fizzi~jayne x

Psst... Before I go, I am looking for guest bloggers to share craft tutorials and techniques on here next month. Interested? Contact me with your idea.