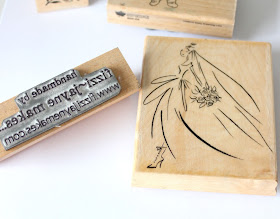
(In this tutorial I use an unmounted acrylic stamp, details of other types of stamps are covered in #2 Basic Materials Needed).
 |
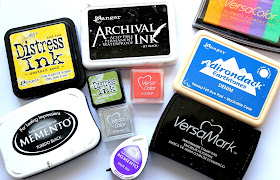
| These are what I will be using in this tutorial plus I have some baby wipes to hand out of shot. Please excuse the state of my stamping block, it is well loved! I am working on a glass craft mat. |
Preparation
- Use a flat, stable surface to work on
- Protect your work surface ideally with a craft mat but if you use something like newspaper ensure the area is completely flat and smooth.
- Choose the right ink for your project (see #1 types of ink post).
- If you are using an acrylic unmounted stamp like in this tutorial you need to apply this to your stamping block. Acrylic stamps cling to blocks without any need for adhesive or foam. Rubber stamps need cling foam, more details about stamps can be seen in the #2 basic materials post.
Also with any new stamp before stamping on your project try it on a scrap piece of paper or card to get used to how much pressure you need to apply.
Now you're ready....
- Take the ink pad to the stamp, not the other way around and gentle tap the ink over the stamp. This way you have more control of where the ink goes and how much you put on, ensuring there is an even coverage.You don’t need to use extreme pressure, squashing the stamp into the ink pad will get way too much ink on the stamp! Look at the stamp to make sure it’s completely inked.
- Wipe ink from around the edge of the stamping block so you don't get any unwanted ink on your project (also make sure your fingers are clean after applying the ink to avoid unwanted fingerprints on your work).
- Decide where you want the image and stamp straight down without rocking. You need to be able to apply pressure from above so standing might help. Always keep one hand steady whilst the other applies pressure across the stamp. You don't need a lot of force but depending on the detail of the design, how big the stamp is and the type of stamp, some may need more pressure than others, this is why it is best to practice on a scrap piece of paper/card.
- Lift the stamp straight up.
Now clean your stamp in warm soapy water or with a baby wipe without rubbing to hard. If you are using a solvent based ink you will need a specific cleaner.
As with any craft, things may not go as you imagined but if there is a smudge or you missed a bit or there is ink on the page where it shouldn't be, don't panic and don't throw it in the bin! Not straight away, you may be able to save it by using your paints / pens to disguise it or use an embellishment to cover it up.
This may not be possible and even if it is you want to know how to avoid these happy mistakes happening again, right? So here are some top tips to help you get the results you want....
Troubleshooting....
Lines of ink from the stamping block
- The acrylic block may be too big for your stamp which can lead to the block rocking.
- If there is ink on the block you need to wipe around the edges before stamping with a damp cloth or baby wipe.
- Are you taking the ink pad to the stamp for application?
Shadows / smudges / double image
- It's likely the stamp moved. Try and keep a steady hand and don't think too much about it, just stamp and always keep one hand steady on the block whilst the other one is applying pressure. Try not to rock or move the stamp. This may take some practice when you first start.
Missed patches
- Not enough ink on the stamp.
- You didn't apply pressure on that area.
- If it is a detailed stamp or you are stamping onto a material like MDF you may need a foam mat to help get an even coverage.
- Is there something underneath your project that shouldn't be there?
- Are you in the right position? You need to be applying pressure from above.
- Are you using textured card?
Missed patches can sometimes be filled in by using your pens.
Still not getting the right results?
- Are you using the right ink? Check back to my first post in the series, as some inks are better for detailed, crisper images.
- Try a different type of paper or card.
- Is the stamping block the right size for the stamp? It needs to be slightly larger than the stamp.
- Try standing up so you are above the stamp giving you more control and it may be easier to apply pressure on the stamping block.
- Placing a foam mat (or mouse mat) under your paper/card may help.
Don't worry if you make a mistake, just have fun, what's the worst that can happen? You have to throw a piece of card away, no big deal.
If you have any problems I haven't mentioned please ask me in the comments as I would love to help and I will have made the same happy mistakes at some point.
You now have the materials and the techniques to get you started so if I have inspired you to start stamping I would love to see your projects. You can tag me on social media or leave a link in the comments below. Or please feel free to email me your photos at fizzijayne@gmail.com and let me know if I can share your work, don't worry if you don't want me to I would just love to see what you have done.
Coming soon ~ Next in my stamping series I will show you a really cool technique, heat embossing!
Happy Stamping!
Also in my crafty tips for stamping series....
 |
| #1 Types of ink |
 |
| #2 Basic Materials Needed |


This has been a really useful series!
ReplyDeleteI'm so pleased you found it useful. I'd love to see any stamping projects you do. I hope to have the "how to heat emboss" post up in the next couple of weeks so keep an eye out for that :-)
DeleteAbsolutely loved how descriptive you were. Thank you.
ReplyDeleteThank you. I'm so pleased you've found it useful. Happy stamping! :-)
Delete